I've lost track of some of those photos (someday, I'm going to put together a series of Chatbooks to keep a visual record of my finished quilts, just not this day!), but I am still in the habit of adding the label (most of the time), and taking a photo (nearly all the time).
So what's in a label, after all?
- It uses some fabric leftovers from the quilt. . . or not
- It can be fancy or plain
- It can be generated on the computer . . or not
- It provides the quilt's 'voice' and records the maker, the pattern source, the purpose (is the quilt a gift?), and special washing instructions
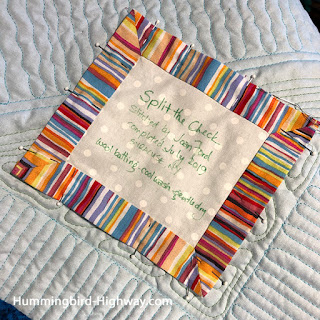
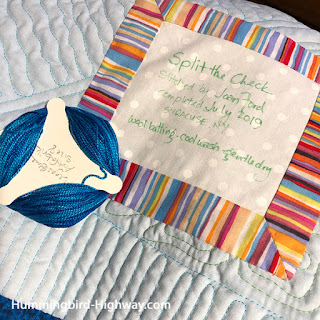
As you can see, I keep it pretty simple. A scrap of fabric, placed on a small piece of sandpaper with information written in my hand using a pigma pen. Then bordered, in this case the borders are mitered. Doesn't really matter where you put the label on the quilt, however, I usually put mine on the lower right corner on the back. I pin it in place with applique pins.
I press the raw edges under about 1/4", then pin the label onto the quilt.
I wear a thimble when I quilt or applique, and I consider the label a lot like applique.
This thimble is a fancy one from TJ Lane - but I have several that I use, some not quite as fancy as this one.
I put the thimble on my middle finger of my right hand - I'm right-handed.
I start sewing with a buried quilters knot. Then come up to grab just a thread or two of the label's folded edge.
Then the needle is inserted into the quilt back and batting, but not all the way through to the quilt top. I travel the point through the batting a short distance and come up through the quilt back and grab another tiny 'bite' of the label fold and repeat the process.
As you can see above, my left hand holds the label in place. My thumb inches along as the stitches are completed. Underneath the quilt (unseen), I keep my left middle finger right under the needle movement. If I feel a slight prick in my middle finger, I've gone through all the layers and I adjust, then carry on.
To add a bit more security (the label can get a beating through use and laundering), I like to add some running stitches in size 8 (in this case) perle cotton along the label edge or border . . .
I'm careful that the running stitches also don't migrate all the way to the front of the quilt, and that they don't just grab the label material but also grab a wee bit of the quilt backing and batting as I 'rock n' roll' the needle to make the stitches.
With that little embellishment, the label is complete! and so is this quilt (almost!)! (Yay!)
Here's a view of the finished label, and a view of the back of the quilt, so you can see how the quilting I used creates playful texture.
As I said up front, the quilt isn't complete until it has a label AND a photo. Here are two. One flat on the ground and one a bit more crumpled in a chair. It helps to have a beautiful sunny day!
This pattern, "Split the Check" is found in the book ScrapTherapy, The Versatile Nine-Patch and it'll be featured on an upcoming Caribbean cruise in 2021 (not the Hawaii one in 2020!) that hasn't been announced yet. Save your pennies, and watch this newsletter for specifics on the cruise, if you'd like to join in on the fun (Yes, it will be VERY fun!). This particular quilt has lots of setting options, much like a log cabin. This offset barn raising is one of my favorites.
Do you add a label to each and every quilt you finish? Do tell!
Happy Stitching!
Joan


