Here in Syracuse, New York, the end of summer means the New York State Fair is in town. Every year, the fair hosts a taste of all things New York . . . from horticulture to livestock to entertainment. So much to see all in one place.
And, of course, there's the food. Some of it makes your heart stop just to think about eating it.
And some items are long-standing favorites. I must admit, I have a weakness for cotton candy, but only during the State Fair!
My husband prefers the deep-fried dough. But not just any fried dough--it has to be from The Villa, an A-frame structure at the entrance to the midway known for bright lights, long fast-moving lines, and loud popular music.
The only item on the menu: pizze fritte. Two feet of dough, deep fried and rolled in sugar. It's like a super long donut or a Mexican churro.
You gotta love it!
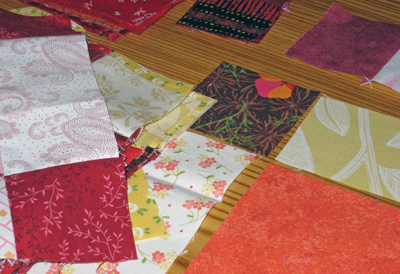
On a separate topic, I received a package from Island Batiks last week.
It arrived, and I've been digging in. I'm pleased to announce my participation in Quilted in Honor. I'm in the process of creating a quilt and pattern. Once it's complete the pattern will be a free download, from the Quilted in Honor site.
As a military spouse, I'm so pleased to be able to support Operation Homefront. I hope you'll follow along as I post my progress making the quilt. Once the quilt is complete, it will travel across the country with this extraordinary fundraising effort.
Happy Stitching!
joan
My niece Karen has been piecing and piecing. She has several quilt tops finished following the First Timer Table Topper pattern. A while back, she asked me for some advice on making her first quilt, and I offered to give her some instructions. But since she lives in Chicago, and I live in Upstate New York, the best solution was blogging about it.
Karen is a new mom and is home with adorable baby Faye. In between taking care of Faye, she is clearly getting in some time at the sewing machine. Look at all the tops she's created on her blog post. Here's one of them:
And this week, it was my turn to help her start turning the tops into quilts! So, on the Q101 blog, I started with some pin-basting info.
And just yesterday, I posted some in-the-ditch quilting 4-1-1.
Karen has always been very creative, and she's really excited about what she's done with her fabrics so far. I can only imagine where quilting will take her. Can't wait to see!
On a separate vein, a couple of weeks ago, I posted some pictures of a new pattern I've been working on. Scrap Book features fabrics from Hoffman California.
In addition, the pattern incorporates trimmed corners on the quilt and coordinating table runner. Those non-90˚ corners can cause headaches for some quilters when it comes to adding the binding.
So-o-o. I created a website page with a step-by-step tutorial to add binding to any not-so-90˚ quilt or runner corners. It's easy if you take it one step at a time.
And what's this on the sewing table right now? Something scrappy is going on around here! Better stay tuned for some fun stuff on the horizon!
Ooh there's a package on the way from Island Batiks, also. Really cool stuff happening. . . really cool!
Stay tuned. . . .
Happy Stitching!
Joan
I got an email this week that absolutely made my summer! Well, okay. I got a lot of emails that made my summer, but this one stood out.
Barbara said:
Attached are a couple of pictures of the quilt "Double Irish Chain" that our group the "Pieceful Quilters" from Anne Arundel County, Maryland completed and donated to benefit the community that was recently affected by the Alberta Flood of 2013. We were informed about this quilt drive recently by your newsletter - thanks for the inspiration.
This quilt was in a friend's closet for over twenty years, cut up and ready to sew and just waiting to be completed. Our group took on the challenge at our winter retreat this year and when we heard about this quilt drive, we knew that we had found the perfect charity for this quilt.
Sometimes the answer is right there in front of you, even when you don't know what the question is . . . yet! Fabulous. Ladies, thank you, thank you, thank you! Someone in Alberta, Canada will be so grateful! If you have a quilt you'd like to send to Alberta, or if you'd just like to learn more about the project, click here.
Speaking of Canada, on Friday I headed north, into Canada to speak at a quilt guild event and to attend an open house event. My first stop was the Canadian border. This was the line after I was in line about an hour waiting for my turn speak with the border agents.
The rest of the drive went smoothly. Many thanks to Sandy Lindal who hosted me for my stay with the York Heritage Quilters Guild in Toronto. Sandy has a long arm business, Scrappy Gal Quilt Company, and while staying at her house, I got a close-up look at her work--wonderful! If you are in the Toronto area, and need some quilting done, Sandy is your gal!
The next morning we headed over to Black Creek Pioneer Village. Sandy is on the set-up committee for the annual quilt show, so she got to work setting up the quilt show for the weekend, and I headed indoors to lead a quilt workshop.
The annual quilt show is outdoors, and the setting is a traditional pioneer village. Each day the quilts are set up for the show, then they are taken down and stored for the night. This guild has got the system down! And the weather was absolutely perfect!
The pioneer village is filled with all kinds of fascinating displays. You feel like you have stepped back into history.
Visitors get to see demonstrations from volunteers dressed in period costume. This gentleman is carding and spinning wool for a mom and a very inquisitive young lady!
This frame is ready for the quilt demonstration.
The quilt are hung everywhere! At the Emporium. . .
. . . and on a barn.
The lawn mowers were out in full force!
Getting ready for the show!
Inside with me, guild members were busy working on their blocks for "Sweet Revenge," a quilt project from ScrapTherapy, Scraps Plus One!
Most folks finished a few blocks, but one high-achiever had a head start. Lovely! Just a few more rows and this one is ready to quilt!
Two happy quilters. Chris on the left, and Maggie, my workshop helper for the day.
On Saturday, I headed out to Georgetown, Ontario, about 40 minutes by car west of Toronto. QuiltSource Canada is a quilt industry distributor. I was invited to demonstrate during their semi-annual Open House event.
All set up and ready to meet lots of quilt shop owners and employees on Sunday and Monday.
Once I was comfortable with my quilty accommodations, I set out for a quick walk around Glen Williams--that's a town, not a person. A small cluster of artist studios are open for business!
Inside each studio, you can purchase pottery, jewelry, paintings, and sculpture directly from the artists. Many of them work on their craft while visitors look on.
On Monday at the end of the Open House, once quilts were put away and the QuiltSource Canada warehouse was returned to normal, it was time to head back across the border.
Since I would be passing so close, and there was still plenty of summer daylight left, I decided to make a small detour on my way home. Before Crossing the border into Canada, I headed into the town of Niagara Falls.
Even though I only live about a three hour drive from the Falls, I haven't actually visited here since I was a kid. Things have changed a bit (a lot!) since way back when. Much more commercial in the town itself! Huge hotels and casinos are everywhere you look.
For a moment, I wondered if this side-step might have been a mistake!
My goodness! Parking is at a premium--$20! By the way, I did not receive any Half-square Triangles with my parking pass! Quite a disappointment. *Wink-wink!*
Fortunately, the park area near the falls is as fantastic as ever! The outrageously-priced parking spot was near the Canadian Horseshoe falls. It takes your breath away to be so close to the brink! By the way, I got over the high priced parking spot pretty quick! Experiencing the Falls is priceless! Worth every penny!
Still photographs cannot possibly capture the essence of the falls . . . the Falls drop about 188 feet--they are much bigger than you think--as the river connecting Lake Erie to Lake Ontario travels eastward!
Mist rises from the basin and clings to the sidewalks (and tourists) above. An ever-present roar as the water races over the brink and into the river below is a constant--fearsome, but alarmingly pleasing. Every inch of the sidewalk that overlooks the entire length of the Falls is dotted with tourists from all over the world.
Below, the Maid of the Mist tour boat at the Horseshoe Falls. The Horseshoe Falls are entirely on the Canadian side of the border. The American Falls are in the background. In 1960, a 7 year old boy named Roger Woodward, went over the Canadian Falls after a boating accident wearing only a life preserver. He survived and now lives in Alabama.
A view of the American falls and the Maid of the Mist tour boat.
The park is beautifully landscaped.
At night, the Falls are illuminated with colorful light until about midnight. These are some of the lights.
And yes, I got the T-shirt!
Until next time. . . .
Happy Stitching!
Joan
Last evening, I finished sewing the binding on a new quilt sample. This is a lap quilt, made from the Chunky Halves pattern and using a brand new line of fabrics from Dear Stella. The line is called Lola, and I just love it! What do you think?
This pattern is reserved just for shops, but starting this fall, you can get your very own 'Chunky Lola' kit at your favorite local quilt shop. Better call the shop and request
a kit of your very own! If they don't know what you are asking for, send them my way, and we'll get them fixed up!
You'll notice that the quilt has a super-sized binding--a chunky binding. There are a few ways to do this, but I like to cut extra wide binding strips, which makes the extra-wide binding nice and full. Scroll down for some extra-tips for an extra-chunky binding for your next extra-special quilt!
Make the quilt. Sandwich and quilt it, then trim the edges. It's ready to bind.
I'm adding a 'chunky' binding. Instead of cutting the usual 2-1/4" strips, I cut my strips 6-1/2" wide. There are a couple ways to do this, some that don't use as much fabric, but I like keeping all the fabric layers in tact for a really nice fullness in the binding. I'm sewing my strips together with a diagonal seam, then trimming the seam . . .
. . . press the seam open . . .
. . . then press the strip in half lengthwise, wrong sides together.
It makes for a strange-looking pile of binding. Is Paul Bunyon in town?
Get out the walking foot, and attach the guide to the right of the foot, about 1" away from the center of the walking foot (where the needle will be)
I like the pin the binding to the edge of the quilt . . .
. . .then draw a line on the binding, at the corner of the trimmed quilt, with a 45˚ angle. You don't have to draw the line along the entire binding, just at the corner so you know when to make a turn.
Align the guide with the trimmed edge of the quilt, and attach the binding with a 1" seam. Be sure to start with a nice long tail (at least 12-18") to start.
When you get to that 45˚ line, make sure the needle is in needle-down, if your machine has that option, pivot and sew on the angled line. This will keep the corners from balling up over time. It's nice to do this on every binding, but I think it's particularly important on an extra-wide binding.
To miter the binding at the corner, place the quilt with the unbound edge toward you and fold the binding at a 45˚ angle to the right. The binding strip should bump right up against that angled stitching you just did. . . .
. . . then fold the binding strip toward the left, creating a 90˚ angle in the binding. The binding will now have a fold that is aligned with the right edge of the quilt.
Rotate the quilt, start sewing the next 1" seam at the folded edge of the binding (the edge of the quilt). Keep going, mitering at the remaining three corners, and leave about 24" unsewn at the binding end. Be sure you have an unsewn binding tail at least 12-18" long at each end.
If you make the continuous binding closure the same way I do in ScrapTherapy, Cut the Scraps! or ScrapTherapy, Scraps Plus One!, you'll want to calculate half the width of the binding strip (6-1/2" divided by 2 or 3-1/4") then use that distance to measure and mark the binding closure seam from the 'kiss' fold. If you want a review of this method, check out this blog post.
Once the binding is secured to the front of the quilt, turn the folded edge of the binding to the back, and secure the fold about 1" away from the quilt edge, covering the binding seam. The extra large Wonder Clips from Clover are really handy for this step!
At the corners, take particular care to offset the bulk on the top and the bottom of the quilt . . .
. . . and take a few extra stitches through all the layers.
Ta-Done!
I don't know about you, but I'm ready for a nap!
Happy Stitching!
Joan