First, a little background. Last year, at the end of September, Hurricane Joaquin was headed toward the New Jersey coast.
This is notable, because I happened to be in Cape May, New Jersey - a lovely tourist town at the very southern tip of the state - on vacation. The town is known for its historic Victorian homes, restaurants, beach front boardwalks, and a quaint shopping area at its center.
When the weather forecasts seemed to have Cape May in the hurricane's cross hairs, I did what any quilter would do. I headed to the stitchery store in town (there isn't a quilt shop in Cape May) while the weather was still nice and purchased a couple of cross stitch patterns, some thread, and canvas. As the days progressed, the weather reports remained full of rain, but fortunately, the hurricane took a turn to sea. No direct hit. But plenty of time and inclination to stitch indoors. My husband busied himself with books, and I stitched. It was so relaxing!
This week I quilted the quilt that started during that wet vacation in New Jersey. For this quilt, I wanted a little different finish. I wanted to face it, not bind it.
I turned to the expertise of my good friend Shelly Stokes. Her quilt, completed over the course of 18 months happens to be on display at this week at AQS Quilt Week in Syracuse - in the winner's circle, of course! Here's a picture of me standing in front of Shelly's fabulous creation which is sporting a big fat ribbon on it! It's an amazing, amazing, AMAZING piece!
Shelly knows a thing or two about art quilts and facings, and she happens to teach an online class on facings, which I highly recommend. You can sign up here, if you choose. (Or you can download Shelly's Three Secrets for Almost Invisible Art Facings from just about any page on her site for free!)
I took the class some time ago, but didn't get to put its technique into practice until this week.
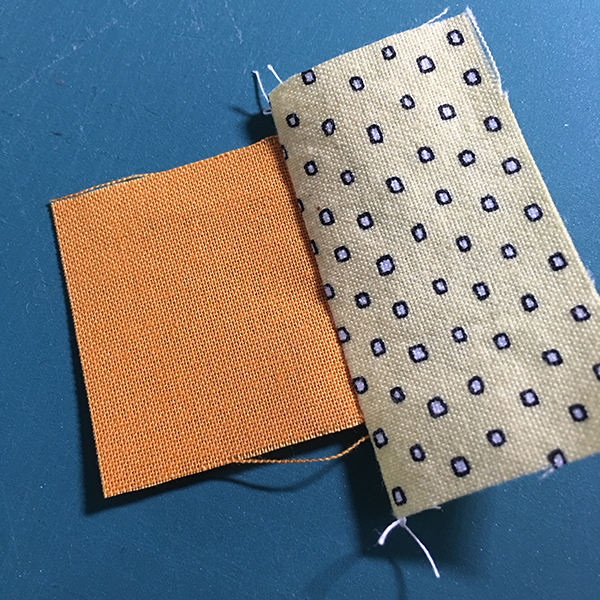
Leave it to me to create a slight variation in the process. Knowing that I wanted to face this project, I gave it an extra wide border, and drew a line where I wanted the quilt to end. Then sandwiched and quilted to that line. (The seagull fabric was found in a shop in Delaware - same trip, isn't it fun?)
Only trouble is that the facing instructions start with a trimmed quilt. I scratched my head for a bit, then figured out how to tweak things.
First I drew lines 1/2" from the edges on the corner and side facing fabrics (the workshop gives you more information about those facing fabrics)
Then I used the quilting lines on the quilt and the lines drawn on the corner fabrics to determine where the facing corner fabric should be placed.
Same thing with the side, top, and bottom facing pieces.
Then sew on that line. I'm skipping a few steps here because Shelly does such a good job explaining each step in detail, one at a time. Much better than this first-time facer!
There is a lot of trimming involved, one layer at a time. Each trim is slightly different from the last one. Trimming, turning, pressing, sewing . . .
And before you know it, my vacation quilt is done!
It's going to hang in my sewing room. A happy reminder from a wet but memorable vacation.
But first it needs a name? What do you think it should be called? Joaquin's Folly? Sorta Storm at Sea? Cape May Capers?
Happy Stitching!
Joan Ford
A couple of weeks ago, I received a package in the mail from my friends with Creative Grids rulers. I was tempted to dig right in, but needed to stay on task with finishing up the book projects first. This past weekend I headed to my friend's cabin for an summer sewing extended weekend. I finished up on a few things I needed to do--samples for the book and a couple of upcoming patterns. Then I rolled out the 4" Log Cabin Trim Tool from Creative Grids.
Who doesn't love log cabin blocks, right? They are classic, they are flexible (lots of variations can be sewn with a center square and strips or logs sewn in rounds), and they are fun to make (that's essential!).
Like any other Creative Grids ruler, the grippy stuff on the bottom keeps the fabric steady while you rotary cut. And with tiny logs (the block finishes to 4" and has three rounds of logs!) the grippy stuff is essential. The 4" trimming tool is the newest in a series of these log cabin tools, and the only one I've actually tried, although I've heard about the others.
The logs are super-skinny--they finish to 1/2" wide. So that means 1" wide strips. But the instructions that come with the tool suggest to cut strips at least 1-1/4" wide, then trim them down after sewing. So-o-oo, I gabbed my scrap bins and made a test block. Looks nice, right?
. . . but when you turn it over, I'm not so keen on the little bits of bulk and the wonky-curvy seams that show up at the end of each seam. That's because you don't trim those extra-wide strips until you've completed a full round around the center square. . . .
. . . Here's how it works. You start with a 1-1/2" center square (orange), and a log that's a little wider and a little longer than necessary. Add sew it to one side of the square.
Press, then rotate the block counter clockwise. The problem (in my mind) arises when you lay the next strip on the unit. That bit of overlap at the top doesn't allow you to line up the raw edges all the way along the seam. And that extra stuff sticking out won't ever get trimmed, so it adds a bit of bulk to the back of the block. No big deal, right? It's the back. Who cares? (You don't know me very well, do you?)
To solve this potential issue, using the edge of the trimming tool, I trimmed the top strip so the edge is even with the center square. . . .
. . . Now I can align the entire raw edge of the strip with the log cabin unit. . .
. . . and sew along the edge.
Rotate, trim, sew, repeat, until you have one round. Now - this is the really cool part of the ruler. They markings on the tool align with the center square, . . .
. . . so you can trim all four sides of the block before proceeding to the next round of logs and sewing.
BUT, that's not how I made my blocks. Seemed like I was adding a lot of extra steps with all the trimming before sewing stuff. Instead, I cut my strips 1" wide, then in 1/2" increments in length. And sewed them like a regular log cabin.
One might think: Then you don't need the trimming tool. However. . .
Log Cabin blocks, even when they are sewn and pressed carefully, can get a little bit of stretch involved. It has to do with the stretchy-ness of the width-of-grain, and length-of-grain fabrics and their interaction with each other while the logs are sewn. Therefore, the tool, aligned with the center after each complete round, allows the block to come back to perfectly square when trimmed. Just the tiniest little bit of fabric trim can make a big difference in a 4" block that incorporates 13 itty bitty pieces! At least, that's what made this tidy-butt quilter very happy!
24 blocks in about as many hours of sewing, plus a few neutral sashing strips and coordinating cornerstones and borders, and the ta-da moment arrives. Now, I only need to sandwich and quilt it and the project is ready to be a wall-hanging or table runner. Aren't the colors tropical-feeling? I used some fat quarters and yardage from the Ink & Arrow Pixies line for the blocks.
And a quick look at the back makes this tidy-butt quilter squeal with joy! No bulky spots, and I even furled the seams at the cornerstones!
Do you have any of the Creative Grids Log Cabin trimming tools? What do you think?
Happy Stitching!
Joan Ford
With some crazy book deadlines, this week I'm taking a temporary departure to show you pictures of the recently completed pond in our front yard. . .
At first, I wasn't sure that digging up the front yard to install a pond was such a good idea, but it's so relaxing, within ear-shot of the soothing running water, that I regularly take my laptop and a small laptop desk to the porch where I can work diligently on text and illustrations for the next book (due in Spring 2017).
When we started digging and the lawn was a mess, I admit that I was a tiny bit concerned. . . but not for long. After only three or four days of mess, a pond emerged! Complete with waterfalls and burbling water!
A few water plants in the main, deeper part of the pond. . .
The koi fish keep the mosquito larvae to a minimum, and they're fun to watch (but hard to photograph!)! At first they did a lot of hiding in the spaces between the rocks. Now, they swim around like champions, especially at meal time. The three are named, Larry, Darrell, and Darrell. (Two of them look really similar)
The frogs just showed up on their own. So far, we have two amphibian squatters. . .one is particularly fond of this lily pad. . .
The water iris is in bloom right now. So pretty. . . .Very delicate lavender color.
Dave insisted on having some eastern prickly pear . . .
And this daylily has nothing to do with the pond . . . it's down by the mailbox. I just thought it was pretty!
Find yourself a peaceful spot this summer, and . . .
Happy Stitching
joan ford
Years ago, I took some hand sewing workshops with my friend, Sharon Stroud. The techniques I learned are time-tested--any block that you can piece by machine can be pieced by hand with needle and thread, and maybe a thimble to save the skin on your middle finger.
Hand piecing is particularly lovely when the block shapes aren't necessarily easily cut with a rotary cutter and standard rulers in a quilter's tool box. The very tip of the pencils in Jane Davidson's Splendid Sampler block, released this week, Pencils, is a fine example of a perfect hand-piecing opportunity. The shapes aren't quite achievable with any of the standard rotary cutting rulers.
First, print the template onto the paper side of freezer paper - you can use the regular grocery store variety freezer paper cut to an 8 1/2" by 11" rectangle and feed it into your inkjet printer/copier. Place a mark on any adjoining shapes where seams intersect. (Do you see the pencil marks on the paper on A7 and A8?) Cut the template shapes on the line and fuse each shape to the wrong side of your fabric pieces.
With a ruler and pencil, draw a line on the fabric that follows the very edge of the template. Draw slightly past the points to create a visible intersection. And continue that little tick mark from the paper onto the fabric seam allowance.
Next, grab yourself a cozy spot under a shady tree. And bring some 50 or 60 weight cotton thread, a pack of size 9 or 10 sharps, some snips, and a thimble if you use one. And your fabric pieces. We'll start with the middle two pieces. Remove the paper and place them back into the layout for orientation.
Place the two staring pieces right sides together, and stab the corner with a pin at the point (where the pencil lines cross) . . .
Check that the pin is stabbed through the markings on the back fabric too. If not, adjust the fabric until the pin stabs through both line intersections.
Secure the layers with the first pin, then begin the stabbing process with a second pin at the other end of the line. This is a pretty short seam, for longer seams, I like to add a few more pins (after stabbing and checking).
With the pieces secured, it's time to sew! Make a quilter's knot. A couple twists around the end of the needle, then pull through. Here's a quick video from my friends at Threads Magazine.
Keep your needle on the top of your work, and make your first stitch starting at the line intersection. Backstitch (make a stitch on top of an existing stitch) over your first stitch to anchor it.
Then load the needle with and in and out motion. (Keep your needle in front of your work - this isn't stitching cards!)
Always (meaning every time you pull the needle through--it doesn't take much for things to go way off track!) check to make sure your stitches follow the line on the back as nicely as on the front. Then pull the needle through.
Keep loading stitches until you get to the end (the intersecting lines), backstitch each time you start a new 'load' and double backstitch at the end point. Break the thread.
Pick up the next piece, in this case, "A7" . . .
Add new pieces to the back of your work. Align the corners AND the intersection, using the STAB and SECURE process as above.
Check the back, there's that match mark line we drew in in the seam allowance to mark the seam intersection.
Sew along the lines as before--Load the stitches on the needle, check the back to make sure you're on the line on both sides, pull through, and start the next load with a backstitch. . .
Then all of the sudden, there is a seam allowance in the way! Backstitch before the seam allowance, pass through the seam allowance so the needle passed through all those points we've so diligently marked, then backstitch to start the last little stretch. Don't break the thread!
Park the needle in the fabric for a moment while you pick up the final piece. Add it to the back (because new pieces are always added to the back) . . . .
Line up all the points again . . . then pick up the 'parked' needle and carry on with the thread on the needle with another line of stitching. Backstitch, load the needle, pull through, pass through the seam, don't forget a backstitch before and after the pass through, and double backstitch at the end. Break the thread.
There you have it, from the back.
After the sun goes behind the clouds, head to the ironing board, and press the seams. Now these cute little pencil points are ready to machine piece into your block!
Do you love hand piecing?? I certainly do!
Happy Stitching!
joan ford