I prefer cutting my squares a bit over-sized, so I can trim them to a perfect square after pressing. If the squares have been cut the mathematically correct size (using dreaded 7/8" measurements), then no trimming should be necessary assuming all my steps were done accurately.
I like this method because I think it gives me the most control over the whole process. I even like drawing the lines! (If you don't understand this, review reason number 5 from last week's post about pre-washing!)
What could possibly go wrong?
Yep, I'm about to do a whole article on drawing the line on the fabric. What could be more basic? Can I use the lines to my advantage. . . or disadvantage? Let's explore.
The Skinny on the HST Line
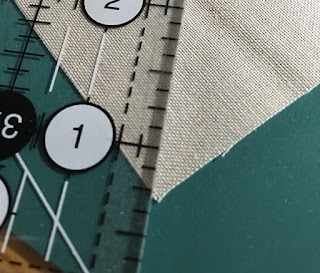
So here I am, making HSTs, and I start out by drawing the line on the back of one of my squares. I place my ruler so it lines up perfectly with opposite corners. . .. . . then draw. Ready to sew. . .
. . . Not so fast. Take a closer look at the line. When you align the fabric square points with the edge of the ruler, the thickness of the pencil creates a line just a tiny bit to the right of the diagonal center of the square. (It'll be a little to the left if you write with your left hand.)
Pfft. No big deal, it's just a little bit off. . .
However, when you sew the seams, one side will yield a smaller HST, the other a larger HST. Still, no biggie, if you're trimming after sewing, there will still be something to trim for both units. . .
That's true, but many of the current popular patterns rely on smaller pieces and those mathematically correct 7/8" sizes: Dear Jane blocks, pieced tiny animals, aprons, and fruits, Splendid Sampler™ blocks, Row by Row Experience™ projects.
Houston, we have a problem.
Instead, when drawing the line to make HSTs, slide the ruler over just a hair to the left of the points (or right of the points for lefties), enough to accommodate the width of your pencil, pen, or whatever writing instrument you're using.
Like this . . .
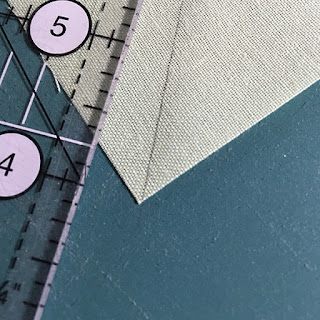
Then draw the line . . .
Spot on!
Stitch-and-Flip Corners
Sometimes a line just a hair to one side of the exact diagonal can be an ADVANTAGE. Take those stitch-and-flip corners--for a snowball block, for example.This time you WANT to align the ruler with the fabric square points, and draw the line just slightly to one side.
Some may say that I'm splitting hairs here, but by drawing the line just to the side of the square's diagonal, you are creating the scant seam line--in other words, you're making accommodation for the thickness of the fabric in the turn of the fold once the unit is pressed.
When you draw the line to one side of the diagonal, then align the square on the corner of the larger unit. Make sure the line is closest to the outer edge of the larger square.
Then sew on the line. This is so much better than trying to figure out where to sew a little to the waste side of a line drawn along exact corner-to-corner diagonal line. At least I think so.
When you press the stitch-and-flip unit, if you've sewn on the line carefully, the corners should be pretty darn close to stacked up. This gives you much more confidence to clip the lower layers, one or both, to reduce bulk in the seams.
It's an itty-bitty variable, but with so many variables in piecing, why not have this one thing a bit more under control?
The last word on Drawing lines
I don't like to bash quilty tools, because everyone likes different things for different reasons. And you choose the tools that work best for how you sew.That being said, there are a number of tools like this one. It's a gadget that helps you draw the sewing lines on both sides of the diagonal. Use the center line on the tool to align the corners on the fabric square, then draw on both sides of the tool to make the sewing lines. Eliminates guesswork where the seams should go.
And it makes sense, the tool (whatever brand, not just this one) is exactly 1/2" wide.
However, drawing the line on both sides is awkward (at least I think it is), and the resulting lines aren't 1/2" away from each other. They are just a little bit more than 1/2" away, thanks to the width of the marking tool. Does it matter? You decide.
A Recap
1. For HST's slide the ruler slightly to one side of the diagonal to draw the guide line2. For stitch-and-flip units, align the ruler point-to-point to draw the sewing line
Happy Stitching!
joan ford


excellent!!!
ReplyDeleteInteresting article. I've noticed those inconsistencies in my own piecing, however, I make over-sized units and trim down. SEW... I find that those inconsistencies really don't matter much for the type of quilting that I do.
ReplyDeleteAnd that's the best part. . . each quilter can decide for themselves how to use these tips - In the end, it's about being informed and enjoying this great quilting sport!
Delete