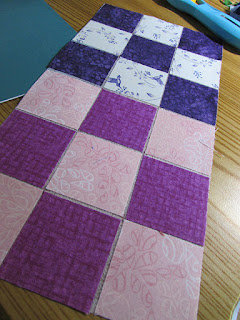
This week, I'm introducing a new layer (truly) to the discussion. Interfacing. Specifically ScrapTherapy Little, Middle, and Mini Scrap Grid!
Each grid is designed specifically to make 9-patch blocks in clusters of six or nine 9-patches. To make the blocks, add 2", 1-1/2", or 1" (Little, Middle, and Mini, respectively) fabric squares cut from scraps or yardage. The interfacing stabilizes the small scraps for sewing. It's almost like having an extra hand to add stability while you sew. The interfacing is light weight and stays in the project as the fabric squares are fused onto the interfacing, then sewn. It's sold by the panel (about a yard per panel). The smaller the resulting 9-patch, the more 9-patches you get from a panel.
For purposes of this article, I trimmed off two 9-patches-worth of the interfacing panel. I'm not as focused on how to use the interfacing. You can get that in great detail here and here. I want to focus on the furl technique when there is interfacing involved.
First, align the fabrics to form 9-patch blocks on the interfacing, then fuse.
Sew the first set of parallel seams. For the Little Scrap Grid, shown, I like to sew across two sets of 9-patches first.
Then snip the interfacing at the cross-hair markings (*) on the interfacing. Be sure to snip through the thread (arrow).
Before I sew the cross-wise seams, I nest and oppose the seams. Seams should alternate--towards and away--'innies' and 'outies.' These steps should sound pretty familiar. The only differences between these steps and those we discussed last week is the presence of interfacing and the ability to sew more than one block at a time. We didn't snip anything last week, because the interfacing wasn't there.
With all the seams sewn, I cut apart the blocks. Notice that I've only done finger-pressing to this point. Now, it's time to press---and furl!
Like last week, I pull out the last two or three stitches of the shorter seam at the seam intersection. . .
. . . Place the block right side down on the ironing board . . . and this is where it gets a little tricky. I push the seams to make the clockwise rotation, giving an extra push at the little green dots, creating a little cup-shaped seam at the intersection. . . .
. . . Then I pres the sides of the cup toward the center, forming two tiny triangles, one on each side of the intersection.
Two steps back, at the cup shape, I could have snipped the tiny line on the interfacing, and the result would have been a mini 4-patch at the intersection, a lot like last week's furl. However, this extra step feels unnecessary when the flattened triangles are just as compressed.
Complete the furl at all four intersections. . .
. . . and the result is a 9-patch block with two sets of 'innies' and two sets of 'outies' . . .
. . .Perfectly flat from the right side too!
I like when my 9-patch blocks have to sets of innies and outies, because. . .
. . . all I have to do is rotate one and the adjoining seams will nest--throughout my quilt! Of course, this rotation thing needs a little more planning if your blocks aren't symmetrical.
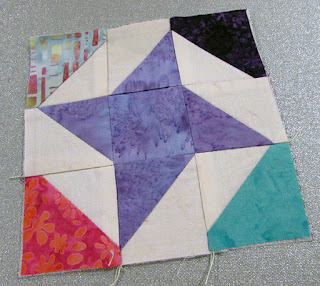
How about going one last step further? The ribbon star block is essentially a 9-patch block made with one 2" square and four 2" half-square triangles. Like before, fuse the pieced elements to the interfacing, and sew, snip, and sew again.
The furling process is exactly the same, except that the pieced half-square triangles may resist a little more than the flat squares. I guess I have the same approach here as I have when I quilt. I am the boss of my quilt (or in this case, my quilt block!). If my quilt and I disagree, the quilt does not get to win!.
Furling victory!
Those who follow these notes on a regular basis, will likely recognize that the Ribbon Star Swap is a current Swap project available through the Hummingbird Highway. (You can still join in the fun! As of September 2015, there is no established end date!) Those in the swap are making fantastic, consistent blocks! Just for fun, I pieced a few of the blocks I've received in the swap together. And, of course, I furled the seams in between blocks, too! I'm just a furling fool!
Pretty from the front, too!
And if you think I'm a little (or a lot) crazy, maybe you're right! Here's the wrong side of a 5" square Mini Mug Mat, made with 1" scraps and the ScrapTherapy Mini Scrap Grid. Furling to die for!
Will you be furling your next 9-patch block along with me?
Happy Stitching!
joan


No comments:
Post a Comment