A couple weeks ago, I started a series on the 'furling' technique. If you missed it, you can get up to speed with this article, and then this one from last week.
This week, I'm introducing a new layer (truly) to the discussion. Interfacing. Specifically ScrapTherapy Little, Middle, and Mini Scrap Grid!
Each grid is designed specifically to make 9-patch blocks in clusters of six or nine 9-patches. To make the blocks, add 2", 1-1/2", or 1" (Little, Middle, and Mini, respectively) fabric squares cut from scraps or yardage. The interfacing stabilizes the small scraps for sewing. It's almost like having an extra hand to add stability while you sew. The interfacing is light weight and stays in the project as the fabric squares are fused onto the interfacing, then sewn. It's sold by the panel (about a yard per panel). The smaller the resulting 9-patch, the more 9-patches you get from a panel.
For purposes of this article, I trimmed off two 9-patches-worth of the interfacing panel. I'm not as focused on how to use the interfacing. You can get that in great detail here and here. I want to focus on the furl technique when there is interfacing involved.
First, align the fabrics to form 9-patch blocks on the interfacing, then fuse.
Sew the first set of parallel seams. For the Little Scrap Grid, shown, I like to sew across two sets of 9-patches first.
Then snip the interfacing at the cross-hair markings (*) on the interfacing. Be sure to snip through the thread (arrow).
Before I sew the cross-wise seams, I nest and oppose the seams. Seams should alternate--towards and away--'innies' and 'outies.' These steps should sound pretty familiar. The only differences between these steps and those we discussed last week is the presence of interfacing and the ability to sew more than one block at a time. We didn't snip anything last week, because the interfacing wasn't there.
With all the seams sewn, I cut apart the blocks. Notice that I've only done finger-pressing to this point. Now, it's time to press---and furl!
Like last week, I pull out the last two or three stitches of the shorter seam at the seam intersection. . .
. . . Place the block right side down on the ironing board . . . and this is where it gets a little tricky. I push the seams to make the clockwise rotation, giving an extra push at the little green dots, creating a little cup-shaped seam at the intersection. . . .
. . . Then I pres the sides of the cup toward the center, forming two tiny triangles, one on each side of the intersection.
Two steps back, at the cup shape, I could have snipped the tiny line on the interfacing, and the result would have been a mini 4-patch at the intersection, a lot like last week's furl. However, this extra step feels unnecessary when the flattened triangles are just as compressed.
Complete the furl at all four intersections. . .
. . . and the result is a 9-patch block with two sets of 'innies' and two sets of 'outies' . . .
. . .Perfectly flat from the right side too!
I like when my 9-patch blocks have to sets of innies and outies, because. . .
. . . all I have to do is rotate one and the adjoining seams will nest--throughout my quilt! Of course, this rotation thing needs a little more planning if your blocks aren't symmetrical.
How about going one last step further? The ribbon star block is essentially a 9-patch block made with one 2" square and four 2" half-square triangles. Like before, fuse the pieced elements to the interfacing, and sew, snip, and sew again.
The furling process is exactly the same, except that the pieced half-square triangles may resist a little more than the flat squares. I guess I have the same approach here as I have when I quilt. I am the boss of my quilt (or in this case, my quilt block!). If my quilt and I disagree, the quilt does not get to win!.
Furling victory!
Those who follow these notes on a regular basis, will likely recognize that the Ribbon Star Swap is a current Swap project available through the Hummingbird Highway. (You can still join in the fun! As of September 2015, there is no established end date!) Those in the swap are making fantastic, consistent blocks! Just for fun, I pieced a few of the blocks I've received in the swap together. And, of course, I furled the seams in between blocks, too! I'm just a furling fool!
Pretty from the front, too!
And if you think I'm a little (or a lot) crazy, maybe you're right! Here's the wrong side of a 5" square Mini Mug Mat, made with 1" scraps and the ScrapTherapy Mini Scrap Grid. Furling to die for!
Will you be furling your next 9-patch block along with me?
Happy Stitching!
joan
A couple weeks ago, I started a series of posts on the 'furling' technique. If you missed it, you can get up to speed here.
This week, the second installment of the series, we're moving into slightly new territory with the same concept. . . 9-patch blocks.
You see, furling (or whatever label you want to give this technique) isn't just for 4-patch blocks and variations of the 4-patchs block (like pinwheels).
However, there is a key to success for blocks with more elements: the seams between elements need to be pressed alternately in each row. Away (from each other)/toward (each other)/away (from each other). Or, as I like to say "outie"/"innie"/"outie"--seams pressed out from the center, then in toward the center of the block, then out again.
When you have alternating seams, each seam intersection behaves just like a 4-patch that just happens to be attached to five other elements.
See, here's a close up of one intersection. Just like for the 4-patch in the last blog entry, remove the last two or three stitches to release the short end of the seam, then twist.
Repeat the process for all four seam intersections. If you pressed alternately within the rows, each intersection will furl like a champion.
Then press from the front. Notice in the photo above and below, you need to let go of the 'press toward the darker fabric.' When you furl, seams don't discriminate about the dark and light fabric stuff.
The bonus is perfectly flat blocks, with minimal bulk where the seams come together
Rotate one of the blocks 90˚and these blocks will nest beautifully with each other. And guess what, where the blocks come together you've created
another furling opportunity! (It never ends, right?)
See, here's a close-up. If I were to sew these two blocks to each other, the seams would nest and oppose, and I could furl once more!
By the way, don't limit yourself to the furled 9-patch, as long as seams within rows are pressed alternately in each row, the seams will furl like a charm in 16-patches (4x4 elements), 25-patches (5x5 elements), 36-patches (6x6 elements), etc. Rectangles, too. For this discussion, I've limited the conversation to 90˚angles, but other angles would work, too! 60˚ triangles, anyone?
Notice how the seam rotation alternates from one to the next.
What could possibly go wrong?
Well, a few things, actually. For starters, if you press the block rows all to one side, then all to the other side in alternating rows, they will nest and oppose just fine as you sew the rows into the block. But they won't furl. You'll start out thinking that things are just dandy and that Hummingbird Highway Nut (i.e. me!) doesn't know diddle. But then you get the seam that wants to be pressed in both directions in between two perfectly wonderful furled intersections. Bummer.
Also, furling doesn't like when your seam intersections aren't nicely nested. Even if there's a little gap where the seams nest or a little overlap, no-can-furl-do. . . just sayn!
And, it should be noted, that not EVERY block with seam intersections should be furled. Sometimes block elements have extra seam intersections. When furling creates MORE bulk in the seams than it eliminates, then maybe furling isn't the ticket!
We'll add another little twist next time. In the meantime, . . .
Happy Stitching!
Joan
Nestled off the beaten trail in western New York, Letchworth State Park seems to have it all! Natural history--the 600-foot canyons were formed by centuries of erosion from the flow of the Genesee River. History--a place of significance for the Seneca Nation. Beauty and recreation--well-maintained trails, campsites, top-rated dining.
Perhaps, the park is best known for it's three distinctly different waterfalls. Here the Upper Falls, are just visible in the background with the grand Middle Falls at the center. The iron railroad bridge, barely visible in the distance due to overcast weather conditions, has been rebuilt from it's original wooden construction.
Viewing the Lower falls is best from a stone bridge across the Genesee River (the river that formed the canyon in the first place).
Of the three, the Middle Falls are perhaps the best known. Water cascades over layers of rock at this point of the park. A perfect place for a selfie with my friend and 'hostess,' Janet Lutz of Calico Gals and Row by Row Experience fame. She's from this part of the state and has visited the park many times. Making her the perfect tour guide.
The path along the river is varies between stone steps, and well-trodden dirt paths, lush with deep green, late summer foliage.
Fragrant wild honeysuckle near the Upper Falls. (Complete with busy bee!)
Can it possibly be time for the New York Aster to be in bloom? Late summer seems to have snuck up on me somehow!
Joepie Weed also reserves its bloom for the August show.
The park would not exist but for the donation of land by Buffalo, NY businessman, William Pryor Letchworth. His rural home, Glen Iris, includes lodging, fine dining (sampled by Janet and me, of course!), shopping, and beautiful grounds.
Decor for lunch on the outdoor porch included these huge hydrangea blossoms.
Like any good journey, it's always so sad to come to the 'end of the trail!' I tell myself, I'll be back and I feel a little better.
How about you? Any last minute Summer vacation-grabs on your radar? Some of the best treasures can be found within driving distance from your own backyard.
Happy Stitching!
Joan
A little technique review this week. This technique is called many things. I happen to call it 'furling,' a term I first heard and started using when I learned hand-piecing. So the technique isn't new, in fact it's tried and true. The technique is perhaps best known for four-patch blocks, especially pinwheel blocks.
Several seams coming together at a center point can make for bulky, lumpy seam intersections. With furling, pieced seams are pressed to one side, then pressed open and twirled at the block's seam intersection.
For this first part in a multi-part series, the focus is on furling a four-patch block.
One little given: I'm not a fan of pressing seams open in pieced blocks. There are lots of reasons for my position, which I'll save for another day (or you can find my reasoning in my books!). Now, I realize there are some exceptions, but in my mind, those exceptions are very rare. So, if you subscribe to pressing seams open, the whole furling process goes out the window.
The fabulous Four-Patch
A four-patch block typically starts with two two-patches. Each with a seam pressed (usually) to the darker of the two fabrics. The two-patches might be cross cut from strip-pieced units or could start with plain old squares. When the four-patch is made from four same-sized square, the two patch seams are short. The seam to connect the two two-patches is longer. Notice that the two-patch seams are opposing (red arrows) so the four-patch seam will nest and oppose (snap together) when sewn.
Once the four-patch seam is sewn and before the block is pressed, with a seam ripper, pull out the last few stitches of the two-patch seam in between the longer four-patch seam and the edge of the fabric. Do that on both sides of the block. And in reality, you don't HAVE to use a seam ripper to pull out the stitches, sometimes the stitches will just 'pop' when you go to furl.
Now place the block on the ironing board, right side down. Use the existing seams (dotted line arrows) to determine the rotation of the block seams. The remaining two seams (solid red arrows) should complete the rotation. Notice that the whole press-the-seam-to-the-dark-fabric goes bye-bye at this point. Half the seams will be pressed to the darker fabric (in this case, the green) and the other two seams will be pressed toward the lighter fabric (in this case, the cream print).
As you push the seams to complete the rotation, notice how the removed stitches in the center allow the center to open up or 'bloom' . . . .
At this point, with the tip of your iron, flatten the block seams. Then flip the block right side up and give the block one last sweep of the iron.
While the seams don't necessarily follow the press-to-the-darker fabric rule, if all the blocks are sewn the same way, the bonus is that the blocks will 'nest' as they are sewn next to each other. A perfect example of this process is found in the very popular Bloomin' Steps quilt.
You can see how the block seams will nest nicely from this back view. And guess what, when you sew the blocks together, the seam intersection between the blocks can be furled, too!
Another furling bonus: it works on four-patch blocks of any size! Rectangular blocks, too, as long as the seams come together in one place.
More on furling next time!
Happy Stitching!
Joan
What a crazy fun time I had at AQS Quilt Week last week! Sure, it's a lot of work, setting up a booth, making sure demos and product is set up and ready. I had a lot of good help--Barb and Debi helped in the booth. And even Dave (my hubby) got to play a part. Dave is very much a behind-the-scenes kinda guy. He helps a lot when it comes to preparing my trunk shows and packing the car for a trip. But he usually stays out of the picture.
Not so this time! Here he is at the All-Star Review at the Everson Museum on Wednesday night! Before my talk at this teacher's event, I snapped a quick pic with everyone waving! (Are YOU in the picture?) There's Dave (follow the white arrow) in the back. I don't think he appreciated the caliber of quilty training he got at the event. Some of the best in the industry made presentations that evening!
As I was doing my demos in the booth, some activity caught my eye in my peripheral vision. Robbie was quite enthralled with my button carpet. (I've never met Robbie before!) His dad would state a color name, and Robbie moved to the appropriate button . . . and he even got it right. . . sometimes! So CUTE!!
Love, love, love Pam's scrappy bag. She received some of the Small Scrap Grid and Mini Scrap Grid interfacing at the Genesee Valley Quilt show earlier this summer and got right to work putting this creation together in time to show it off at the show in Syracuse. She used a little bit of all the interfacing products in her bag. Fabulous!
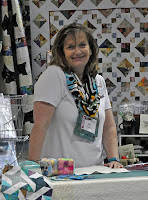
Have you ever met at Joyful Quilter? I certainly have. Bunches and bunches of them stopped by the booth on Friday. Here's Susan, their fearless leader and Joyful Quilter shop owner, stopping for a quick photo-op in the booth! Their website is currently under construction. The shop is located in Scotia, NY. Thanks, for stopping by and for inviting me to join you after the festivities of the day for dinner.
On Saturday, after the booth was packed up, boxes stowed in the basement work room, Dave and I went out to the Brasserie CNY for some Happy-tisers and dinner. By the way, the French onion soup is killer. Dave had the Bruschetta. *The glass of wine wasn't too bad either!*
My friend, Shelly says that when you wrap up big projects, it's important to take some time, step back and appreciate what you've done before jumping right in to the next thing.
I'm not very good at relaxing. Can you tell? But with all the fun quilty stuff lurking in my sewing studio, I can't help but consider all the possibilities!!
Like:
A while back, I experimented with a curved piecing tool and a very blended set of pre-cuts. The result is this lap-sized quilt. Only recently it was a quilt top. Quilted and bound, it's now ready for its next home. My neighbor works in the palliative care unit at one of the local hospitals. A tough job for sure. He is always so appreciative of quilts that I give him for his patients and their families. This one is headed his way this week!
Continuing to work on the sample for the Country Roads Shop Hop coming up this fall. The ten shops in the hop will be distributing my pattern. I'm making the sample for the (eventual) pattern cover.
Having received my first set of swapped blocks from the Ribbon Star Swap, I'm itching to start making something. . . .you can still join in the fun. The swap is on-going. Blocks are due each month. More info here.
I don't know what possessed me to purchase this pattern from A Very Special Collection. (I do know what possessed me, the quilts on display were beautiful!) Their booth was across the aisle from me at the aforementioned AQS show. These fabrics have been sitting in my stash since my Alaska cruise last summer. Paper piecing isn't my thing, but once in a while every technique should be taken out for a spin. By the way, these blocks are about 4" square. The quilts on display in the booth were stunning. But tiny, itty-bitty pieces. Oy!
Oooh! And what's this on the sewing table. . . . Can't tell! It's a secret!
And I think I have finally found the perfect project for this citrus-y collection of batiks from Hoffman California Fabrics! Can't wait to dig in.
Can't forget about this UFO shelf in the sewing studio. The pink quilt (above) came from here, but the shelf *might* have gained a new occupant or two over the course of the summer. Does this kinda thing happen to you, too? One step forward. . .
 So many quilts, so little time! *Wink!*
Happy Stitching!
Joan


