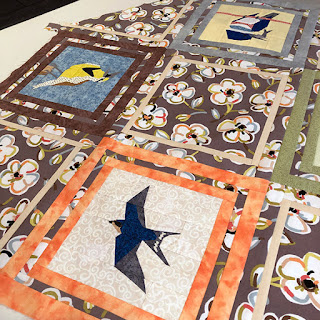
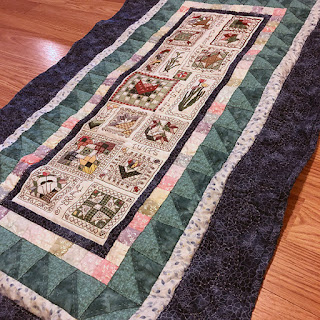
This week, I have a quick recap of what's happening with those couple projects I've been chatting about for the last couple of weeks. The Table Topper I've been working in is progressing nicely.
It's a slow-go however, because I am doing quite a bit of stitch-in-the-ditch which can be tricky. I only sew for an hour or two in the morning each day, so that naturally means progress is slow without a big chunk of dedicated time. I'm not going anywhere, so I'm okay, if the quilting comes along in its own sweet time. No deadline for this one.
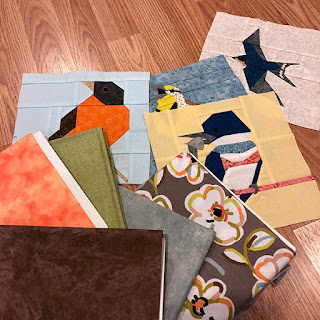
Notice that one of the blocks is the newest block from The FLOCK, the Baltimore Oriole!
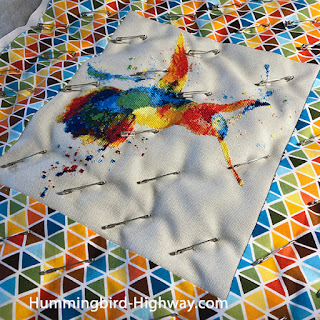
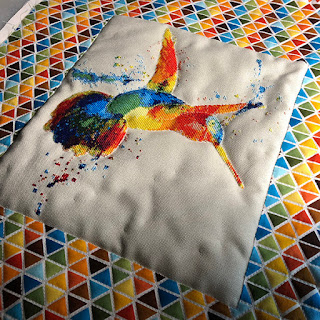
I finally settled on a quilting solution for the big area of negative space in this cross stitched hummingbird project.
I had hoped to find some inspiration in Laura Wasilowski's book, Joyful Stitching and I did! These little seed stitches make a very nice fill to reduce the puff while adding a really nice texture to the linen areas. Like, the table topper above, it's slow going. I'm good with that and I'm thoroughly enjoying the journey watching this move forward, little by little.
Breaking point
Whoa!! I had a stop-me-in-my-tracks moment this week as I was digging around for some batting scraps in a remote area of my basement.
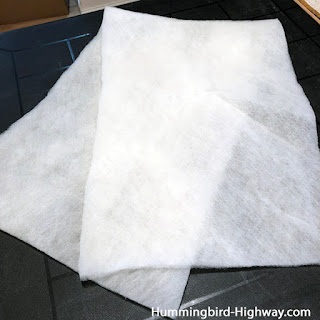
With all the quilting I do, I buy batting by the roll. I use a lot of wool batting around here. It's a bit more expensive, so I hoard the scraps because they can be used in lots of different projects - including the little bits.
My routine has been to cut a chunk of batting just the right size for the project, and trim off any extra, leaving me with big hunks, medium-sized pieces, and little bits, all having the potential for other projects.
Me being me, years ago, I found an empty table in one of the back spaces in my basement and started stacking up those pieces - all three classifications - chunks, pieces, and bits - in one big pile on the table.
Not so bad when there are one or two scraps, but over time, the pile was out of control. Everything in one stack . . .
And last week, I hit a breaking point.
I pulled the mess onto my work table and started separating:
Medium to Large Chunks - pieces that could be used for something long and skinny - like runners - or something small but chunky - for small quilts, toppers, pillows, etc.
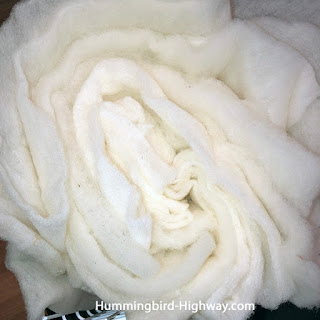
Smaller pieces. Too small for most quilts, and almost in the bits category, but the possibility for a skinny runner or small wall hanging makes it worth keeping separate.
Maybe less than 12" wide or long.
Little Bits. These are generally the long skinny pieces that are trimmed from the quilt when the quilting is done and before the binding is applied.
These are perfect for pin-cushions and biscornu stuffing.
I stacked pieces from each category neatly:
- Large chunks in a tidy pile
- Medium to small pieces stacked, then rolled together, and squished into a wire storage bin
- Little bits jammed into a basket
Now they fit nicely on the table. They don't flop all over when I need to excavate a usable size. And I can easily go right to the size category to get what I need without wasting time in the search.
Took about 30 minutes. Seems like such a minor improvement, and it's okay if you're laughing at me for making such a big deal out of a silly detail, but every little bit of searching-for-the-right-piece-of-batting time takes away from quilting and sewing time!
Now, if I can just sort through that pile of old paperback books on the shelf behind the batting. However, that's sacred territory - for the most part, those are Dave's - he's a book hoarder. (Do you think he'll notice if I 'sort' them a little bit?)
Happy Stitching!
Joan
Feel free to pin this image so you can find this post later
Last week, I started on a journey to create a table topper from four of the bird blocks from The FLOCK.
I think I left off having finished adding borders to the four bird blocks I chose. I continued on to create four triangular corners and a center made from the print fabric and some cream fabric. The top is done! And . . .
Then I was distracted. You've been there, right? The 'squirrel' in the sewing room. The UFO (UnFinished Object), the PhD (Project Half Done) . . . . called me to come to its 'rescue.'
In this case, my 'shiny new object' isn't really new. I've been working on this stylized hummingbird cross stitch piece (the pattern found on at Danceneedle on Etsy) for several months now, on and off.
I think I was inspired by the washing experiment I did on a quilted/cross stitched piece a couple weeks ago. Or perhaps I just got on a tear. Or needed some bright colors in my life after a gloomy, rainy, snowy week.
Mix in a fair bit of couch-potato sewing time in front a couple MCU movies over the weekend. And the stitchery is finished.
So now what?
I found this fun geometric print in my stash that goes perfectly with the thread colors in the stitching. So I used the applique technique I've been playing with and talking about, for the last month or so, to add a border all in one piece. With this technique, the border has no seams, so the geometric pattern isn't broken.
I've had a few requests for more details on this technique I'm creating, I hear you, and I promise I'll tell you all the nitty gritty soon. I think it's pretty slick, and I'm anxious to share, not quite yet though. I need to get a little more confident with it, first.
I cut a piece of the print about fat-quarter size and appliqued it in place on the cross stitch.
Then layered and pin-basted the quilt to prepare it for quilting.
Because the linen/cross-stitch element has a pretty low thread count compared to the quilting cotton, I added an extra layer of fabric to the quilt sandwich:
-
Top
- Solid Cream fabric
- Batting (I like wool)
- Backing
That extra layer of fabric (among other things) made me think this piece should be machine quilted.
I followed the lines in the print to quilt the borders. . . .
. . . That left me with a pretty puffy center. Yeah, one might argue that I shoulda quilted the center first.
I didn't.
I'm like that sometimes.
I outlined the the bird with some machine stitching.
And this is where things fell apart a bit. I tried some free motion quilting to fill in the negative space on the linen.
Yuk. (I didn't make a photographic record, but trust me, it didn't work!)
I picked out those stitches and. . .
. . . Scratched my head a bit.
Then I caught a view of this book from the corner of my eye, Joyful Stitching (aff.) by Laura Wasilowski. I bought it from Laura last fall.
I think I might find some inspiration here to fill in that negative space and de-puffify it a bit.
Sometimes, it's nice to justify a little chaos in the sewing room - things don't grab your attention when everything is put away neatly! (*wink!*)
I can't wait to thumb through the pages and get inspired.
Stay tuned! . . So many balls in the air! Or quilts on deck, as it were.
Happy Stitching!
Joan
You know, I keep talking about these bird blocks from The FLOCK, and they're really cool (I think they are, anyway), but they're even cooler when they become something.
This week, I decided to do just that - make something from four of the blocks from The FLOCK.
Now, before you say, 'oh, boy' here we go again with all The FLOCK stuff. (I realize that I can go on and on all day about these birdies - by now, you must know I'm kinda bird crazy!) HOWEVER, what I'm doing here could be applied to ANY 8" (finished-size) four-block collection.
I started out, not really knowing where I was going to end up. (I love those kinds of journeys!)
So I went to my stash, and picked out a focus print and four, make that five - I keep forgetting the cream - solid-reading fabrics that coordinate with the focus.
I kinda think that part (the fabric selection) is pretty key. Generally speaking, yes, the focus print goes with the four bird blocks that I selected. But I kinda ignored the birds when I pulled the fabrics. Another important factor, I chose a print that was 'noisy' but not so noisy as to steal the thunder from my detailed pieced blocks.
My mindset for the fabric pull: birds go with whatever environment they fly into. Sure, some blend into their surroundings, but not all (think cardinal on a winter day). If I were making this with non-bird blocks, I might pay a little more attention to the block coloring, but maybe not.
As stated, I'm not really sure where I'm going to end up, so my choices may wind up being a mistake. But I don't think so.
I want to keep the construction pretty simple. So I'm adding some skinny borders to the four blocks.
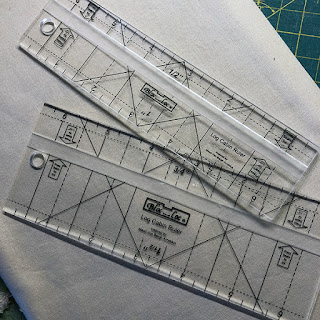
I pulled out my BlocLoc Log Cabin trimmers - the 1/2" and 1" trimmer and the 3/4" and 1-1/2" trimmer. While they aren't necessary for making this project, these are fun to use, and I like to have fun when I making stuff.
I've used these tools before on the cruise quilt I created last year called Water Logged. And I used the smallest size trimmer for my holiday card-stuffers in 2017.
What I like about these log cabin trimmers - they have that same seam allowance groove on the bottom of the ruler that the BlocLoc Half-Square Triangle trimmer has (my favoritest HST trimming tool)
To use the log cabin trimmer, I cut the strips a little larger than needed. For a 1-inch finished border or log, I cut the strip 1-5/8" wide instead of 1-1/2". And maybe about 1/2" longer than needed to have a little extra on each end.
Then I centered and sewed the strip to the block as normal. (I'm a serious pinner when adding strips to things)
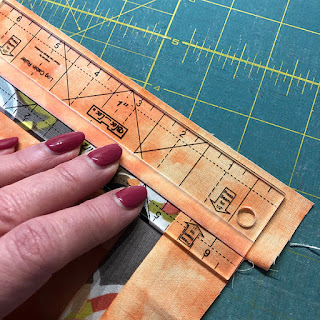
Next, I pressed the seam toward the newly added strip. Chose the tool and the side of the tool that to trim to the desired measurement. Each trimmer trims two different sized logs.
I trimmed the end (on the right in the picture below). . .
. . . then across the top. Nice thing here is that the ruler is shorter than the block, but that doesn't matter, I just slid the ruler along the seam, making sure the groove continues to lock in to the seam allowance lump.
Slide and trim, slide and trim, until I reached the end.
(Yah, ignore the fact that I put the rotary cutter down with the blade open - bad! bad! bad!)
Then I rotated the block so I'm not cutting at an unnatural angle, and trimmed that last bit on the end.
I kept adding strips until all the blocks had three borders, an inner one that finishes to 3/4" wide, a middle 1/2" finished border and an outer 1" finished border. I alternated the solid fabric with the focus print on each block, and I used a different solid on each block.
I like the way the print fabric almost feels layered.
And that's as far as I got. . . More to come as it develops. Stay tuned!
Happy Stitching!
Joan
Last week I showed the steps I took to turn this cross-stitched daisy on linen into a non-conforming sized pillow. At the end of the article, I questioned, pensively how this might survive a washing.
This week, I decided to put my speculation to a test.
Several years ago, I made a wall-hanging quilt from a cross-stitched piece that featured tulips. I finished the stitchin, added quilting cotton borders, quilted the piece by hand and hung it up.
About a year ago, two gregarious conures (birds) joined our household, and their cage was placed nearby.
Woodstock and Doodle (the conures) have lots of chew-toys to keep them busy, but hey prefer to chew things other than their toys, sometimes, like quilts. That little nibble on the back of the quilt is their handiwork.
I took the quilt down, and laid it nearby where it got dirty. but I've been afraid to wash it because (1) the chew spot, and (2) since this was made from linen/quilting fabrics, I wasn't sure how it would survive a toss in the drink!
With the pillow raising similar questions, I decided that I found my test case.
First, I washed the quilt as I would one of my hand-made wool sweaters. Filled the basin with cold water and mild detergent (I used Soak Wash, in this case). Let the quilt sit in the cold water for a bit, to let the Soak Wash do its thing, rinsed a couple times with clear, cold water, then threw it in the washer for the spin cycle.
Hmm. Pretty good!
The quilt crumpled a little, but I was really expecting the linen to react differently, more specifically, to shrink at a significantly different rate than the rest of the quilt.
That didn't happen.
Excellent!
But not done.
What if this was high-traffic quilt like a child's quilt that would get used a lot. Nobody wants to hand wash a kid-quilt, even if it's a special one, I'd guess.
With wild abandon, I threw the quilt straight in the washing machine for Test #2.
I treated this like I would treat any other hand-quilted quilt that I've made. Added regular laundry detergent. Set the machine to the delicate cycle and one rinse.
For its first washing, for almost any quilt, I add a color-catching cloth. I was pretty confident that the DMC threads used for the stitching was colorfast, but I threw in the cloth anyway for this inaugural wash.
And then I hit 'go'
When I came back, to my delighted surprise, the quilt was in just as good condition as after the hand-washing.
Better in fact, because some of the dirt didn't come completely off with the hand washing and it did with the machine bath.
It laid flat with a little reshaping, but, it was still wet, It went through the spin cycle, but not the dryer. . .
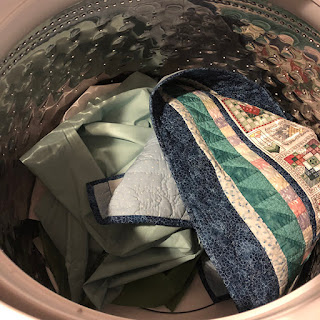
As long as I was on a roll, if this was going to be a true test, the quilt had to go in the dryer.
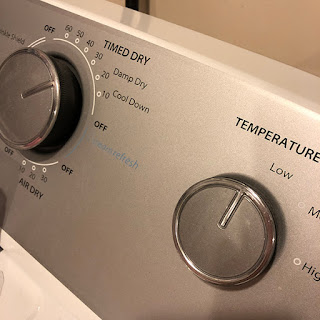
Again, I used settings that wouldn't be unusual for me to use on any of my quilts. Low temperature, and about 20 minutes for this size. If it was a larger quilt, I'd probably set the timer for a longer amount of time, 30-45 minute intervals, checking the quilt in between.
And this is where things fell apart. . . . sorta.
Although not 100% crispy dry, the quilt was still just a hair damp, but it was really wrinkly.
However, on closer inspection, the linen really didn't shrink. The quilt did have that crinkly texture that is pretty typical of a just-washed quilt.
Since this is a small piece, I put it face down on my big board ironing surface and gave it a quick, lightly steamed pressing.
And it was just like new. Maybe a little bit out of shape, but not noticeably so. Certainly not unevenly 'shrunk.'
The chewed spot frayed a little, but since it's on the back, no one would ever see it hanging on the wall.
A couple additional observations/recommendations:
- I enjoy doing stitching sometimes, but I really enjoy when I can turn those stitcheries into something besides framed work. As a quilter, turning the stitchery into quilts is a really nice option for me, and I like that it seemed to survive washing quite well.
- Granted, I didn't put this to a rigorous test, like hot water wash and dry. But then, I would never hot water wash and dry any quilt. So this felt like a reasonable test, but not a rigorous one. If I were to gift this to someone, I might include washing instructions on the label to ensure a better chance for laundering success if this piece were to leave my hands.
- DMC thread has a reputation to be colorfast, however, I think I would still take the precaution of adding a color catching sheet in the washer. I'd be much more leery about washing a piece that incorporates hand-dyed threads without testing the thread for colorfast-ness.
- Linen is a lower thread count than quilting cotton, so I take a couple of extra precautions when I make a quilt with stitchery in the mix. First, if I'm piecing the linen into the quilt (like the tulips), I trim the stitchery anticipating using a regular 1/4" seam, but each seam involving the stitching has a zig-zag stitch added to the seam allowance before the seam is pressed. In the case of the pillow, since the quilting cotton was appliqued onto the linen, I left the entire linen fabric in tact including the zigzag I placed around the perimeter of the linen at the beginning of the stitching to keep it (the linen) from fraying. Additionally, especially if this quilt has higher use potential, I add another layer of a neutral fabric (matching the linen color) between the stitchery later and the batting to keep the batting from migrating/bearding over use and multiple washing.
I like that this test gives me a bit more confidence and few more options when incorporating stitching on linen into quilts.
. . . And I was entirely prepared that my tulip quilt would be ruined as a result of this test. I'm glad it wasn't. I consider that a bonus!
Happy Stitching!
Joan


