The saga of the Split the Check quilt from The Versatile Nine Patch book continues.
Last week, it was pin-basting and the beginning of some straight line quilting.
This week, we've graduated to free motion elements.
Last time, I believe I left off with the straight quilting in-the-ditch and 1/4" along the 'blue' side of the stripes.
A this point, I have added similar in-the-ditch and 1/4" quilting using the walking foot with green thread on the green striped pattern areas, creating a four rows of quilt lines along each striped sashing element.
With all the straight line quilting in place, I switched to the darning foot, dropped the feed dogs on my BERNINA, and moved into free motion territory.
As before, I remove the pins a little at a time to make way for the quilting.
And I chose an easy, fluid fill pattern that looks a bit like connected triangles. As I form the triangle, I make the outside shape, then create a shadow of that shape inside, and leave a path to come out of the shape. This in-and-out technique takes a little practice, but once you get it, it's easy, fun, and fast!
Because I quilt on my domestic machine and not a long arm, I often get questions about 'how' I get the 'whole' quilt into the machine throat. And the answer is I don't (or at least, I rarely do). I usually plan the quilting so I only have to get to the center of the quilt, so that means, I only have to get half of the quilt in the throat at any point.
I don't roll, or use clips. I do work a section at a time and remove pins as I go. Only the ~10-12" square-ish section that I'm working on at the moment is flattened by the palms of my hands and swirled in place under the needle. I'm constantly changing position and direction so rolling up the parts of the quilt I'm not working on doesn't make sense and gets cumbersome.
At least for me. It's hard to describe the process, but I just squish, flatten, and move. A fair amount of practice helps. A long time ago, I also had to let go of the fear (fear of making a mistake, or of 'ruining' the quilt). I feel the quilting adds character, and the look and feel of the organic flowy quilting is my preference for my quilts.
As you can see, each green 'stripe' gets filled in with the stitching.
I'll switch threads back to blue and repeat the process - perhaps with a different fill pattern - in the blue spaces.
Just like last week, the powder blue backing makes it a bit easier to see the quilting pattern as it develops.
And a closer look at the triangle fill free motion quilting from the back of the quilt.
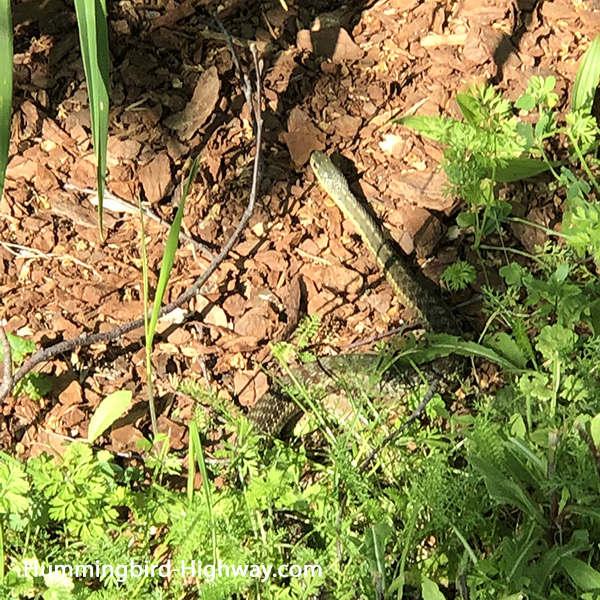
This little garter sssnake ssstartled me while I was sssssnapping picturessss. I think I might have disturbed his sssssleep.
An hour a day at the sewing machine doesn't seem like much. But each hour added advanced the project that one extra step.
At this point, I start to get excited about the finish. Nothing like adding that last stitch to the binding and calling it 'done!'
But not quite yet. . . .
Happy Stitching!
Joan
With the batting ordered, delivered, and installed in its storage space in the "Ford Underground," it's time to get down to the business of quilting.
Last week, I shared the fluffy saga of a big roll of wool batting entering, rather unceremoniously into its special place in my storage room.
At the end of the post, I showed you this quilt top that is ready for quilting. I'm here to tell you that the next steps are underway. . . ..
I prefer to pin-baste my quilts. That means I clear away a big patch of basement floor (I have a finished work room in my basement with hard-as-rock pergo flooring), tape the backing to the floor, right side down, with painters tape. Then layer on the batting (the aforementioned wool stuff) and the quilt top.
Smoothing out any lumps and bumps before a new layer is added.
The I park my fluffy brains (otherwise known as my posterior) in the middle of the quilt, and start pin basting, from one end to the other.
Some folks say you have to start basting in the middle and work out. I'm here to tell ya, I don't do that. I start at one end of the quilt and keep going until the whole thing is pinned.
I place the pins pretty close together, about as far apart as cookie dough on a cookie sheet (m-m-m cookies!).
I use this handy little tool (or an old spoon) to save my finger tips. And I use 1-1/4" curved safety pins to get the deed done.
Why pins and not spray baste?
It's a fair question . . . 1) I prefer pins over spray baste because it leaves a visual record of where I've quilted and where I still need to quilt. As I quilt, I pull out the pins as I go, so if there's a pin, I haven't quilted there yet. 2) I pre-wash most of my fabrics, and every time you wash, the quilt looses color. So I tend not to wash the completed quilt until I have to. Using spray baste implies that I need to wash the quilt sooner rather than later to get the gunk out.
There are a couple other reasons, like the messy overspray, fumes, and my opinion that the pins hold the layers better as I do a lot of crunching and squishing as I quilt, pins are re-usable so I don't have to keep buying more.
With the quilt layers basted, I like to roll the edges of the backing onto and over the quilt and batting edges around the perimeter of the quilt. This sometimes (not always) helps to avoid having those corners folded into the quilting area by accident (enter Mr. Seam Picker to reverse sew that quadruple-layered quilting)
Plus it keeps the quilt edge crisper and makes the quilt easier to handle.
Usually one or two folds takes that extra backing over the quilt edge, then pin with a few more safety pins.
I should add that I quilt my own quilts on my domestic machine (BERNINA 750QE). Prep would be different if you were taking the project to a long arm process.
Then it's time to 'reclaim' the pins.
I almost always start with some straight line stitching using the walking foot. In this case I'm following the diagonal design path to create lines of quilting that are blue and green, and I'm using blue and green thread to match (sorta, close enough) each color area.
In this case I'm also adding a line of stitching 1/4" away from the diagonal ditch quilting.
That's as far as I got this week.
I think it's a little easier to see what's going on with the quilting when you look at it from the back.
I'm using a plain pale blue backing fabric. Now, if you're not confident about your stitching, then I suggest using a fussy-printy something for the backing - it'll hide any quilting 'issues' better.
Next, I can either add some free-motion fill in the blue spaces, or switch to green thread and repeat the ditch and 1/4" quilting process for the green spaces.
The puckers you see here between the lines are the pins. Those will go away as the pins are removed and the quilting advances.
The straight line stuff seems to take a long time - I like to be careful to stay on the down-side of the seam, but then things really pick up with the free motion stuff. Or at least I hope so. . . We'll see!
If you have no idea what I mean by that down-side stuff, I talk about it on page 77 of When Bad Things Happen to Good Quilters. I can direct you here if you need a copy! *wink!*
Happy Stitching!
Joan
I'm not sure who coined the phrase, "Good things come in small packages."
Sometimes that's true, but when you place an order for a roll of batting, a whole lotta fluff arrives in a pretty big package.
I've been out of wool batting (Hobbs Heirloom wool is my favorite) for a while now. So I picked up the phone and ordered some just the other day. Yesterday it arrived in a soft 'poof' at the front door.
I didn't hear the delivery person, so I was surprised by this six food box at my front door when I checked to see if the Orioles finished up the grape jelly and needed a refill. My view was blocked!
When I get a big package, I sometimes wait and get some assistance from Dave once he gets home from work. But the box was light and easy to bring inside.
But then it blocked the entryway inside!
I opened the box, and started pulling the big batting roll. If I were smart about it, then I could have cut the sides of the box, too. But noo-o-o. The pulling created a little vacuum inside the box. Eventually the whole project took over my entry hall way, at last the batting was birthed!
Okay. Next challenge was getting it downstairs to the "Ford Underground" where I have storage space set aside just for batting.
I opened the basement door, and couldn't resist the temptation to set the roll free to slide down the stairs.
The free-falling batting hit the stack of empty fabric bolts like a bowling ball hitting the pins - I got a spare!
Then finally, removing the plastic created an immediate cloud of fluff as the wool expanded immediately. Wonder how they got all that fluff INTO the bag?
Anyway. I struggled a bit with this oversized toilet-paper-style installation. The batting is light weight but the size made it quite awkward!
I'm kinda glad nobody witnessed this part. . .
Now that I have batting - and it's where it belongs, I have no excuses. Time to sandwich, baste and quilt this top! The pattern is from The Versatile Nine Patch, called Split the Check. I've been working on it off and on for a few months now.
Happy Stitching!
Joan
After a couple of weeks of how-to's (you can re-visit the scrappy wash cloths here and the fabric biscornu here if you missed them), I don't have much to say for myself this week. . . . well, maybe one or two things . . .
The Genesee Valley Quilt Fest was held this past week in Rochester.
Wow! Lots of vendors and quilts on display, making the hour-and-change trek to Rochester from Syracuse well worth the trip!
From the second floor of the RIT Field House, you have a bird's eye view of the show.
These next two photos, one full view, the other a detail of the quilting, are of a fabulous quilt made by Nick Williams. The base fabric is a panel called 'Dream Big.' The quilting alone is spectacular, but the applique and the subject matter of that applique overlay (my favorite hummingbirds!) really makes this piece jaw-dropping.
My cross stitch hummingbird quilt was also on display at the show. Remember my progress reports on this project earlier this year?
. . . And, of course, there were vendors at the show. I purchased one of those extra-fine mist spray bottles in this booth and received this bee stencil as a bonus! Bees seemed to be everywhere at the show - in the fabric prints on sale in the vendor booths, especially. By the way, I made a few other purchase at the show too! *A-hem!*
Once back home, the purple half-square triangle table runner is now pin-basted. Only a couple evenings ago I started the hand quilting on it.
Can't wait to have it finished.
(Yeah, I'm a little weird, I hate thread basting, so I pin baste and use a hoop to hand quilt--I remove the pins as I quilt. It works for me.)
See, that was quick! Perhaps I'll get myself into more trouble this week. . . I have a few ideas . . . *wink!*
Happy Stitching!
Joan