I received an email from Debbie earlier this week. She said, "Have you ever considered doing a biscornu shaped pin cushion using fabric?" If you've followed this blog for any length of time then you have probably surmised that I'm a bit addicted to these wonky, stuffed pin cushions, typically made from some variation of charted- or counted-thread stitching on light canvas or linen.
But what about fabric?
So this week, I reached into one of my ScrapTherapy bins, pulled out some 3-1/2" scrap squares and decided to give it a go. A quick, more-pictures-than-words summary of the steps I took follows:
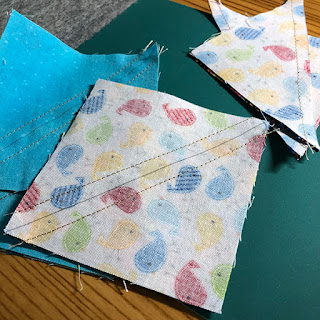
First I pulled out two each of four different 3-1/2" square scrap prints from my ScrapTherapy bins and made half-square triangles. (You know the drill, draw a corner-to-corner diagonal line on the back of half the squares, place two right sides together, sew 1/4" from each side of the line, cut apart, press and trim to 3" square.)
I arranged the half-square triangles into to 'broken dishes' blocks. Sewed and pressed.
Then I set up the blocks to sew the first side, just like the first step in making a stitched biscornu.
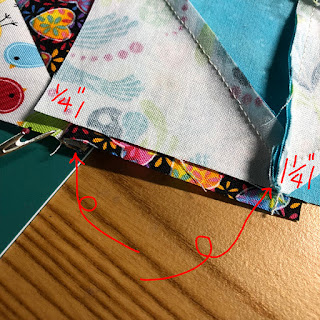
Unlike the stitched biscornu, I need to place these blocks right sides together to sew them. But before I sew, I need to slide each panel to offset the 1/4" ends (see the photo above, then the one here for the before-and-after the 'slide').
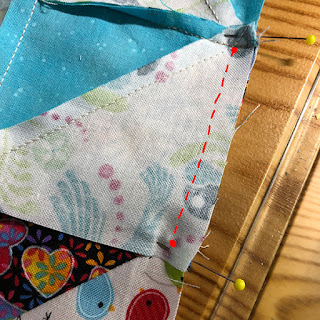
Notice that I'm also going to temporarily pull the vertical block seams out of the way (squiggly arrows) . . .
. . . to sew between the 1/4" seam allowances. I started and stopped with a back stitch at each end (so it looks like the first photo below, then the one below it, once sewn.
I continue to make my way around the edge, one side at a time, stopping and starting for each short side seam.
This is important! I had to remove a 1/4"-worth of stitching on the vertical and horizontal seam ends to allow the pieces to nestle together for sewing. (See the circled section in the photos above and below? - that's actually the same spot, even though one is at the top of the photo and the other is at the bottom of the photo)
Continue one side at a time around the block until all except one 'side' is sewn.
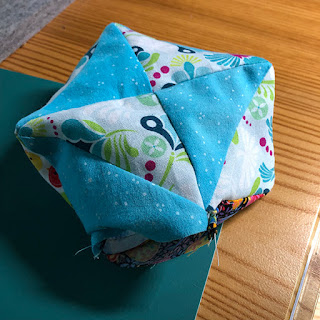
Looks like a hot mess. . .
Then turn the biscornu inside out and it doesn't look so hot-messy anymore.
Add stuffin'. I like to use leftover wool batting scraps.
Then close that last seam with hand stitching.
I must say, I was getting a little anxious to see the result at this point, so my stitches aren't very tidy. But they did the trick.
Add a button to each side to tuft.
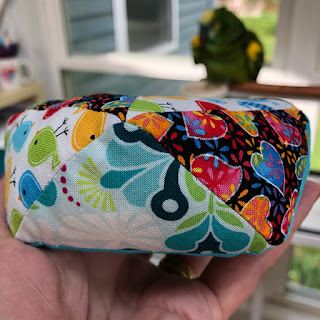
Ta-done! The 'top' view. Then the bottom view--Completely reversible!
And the side view.
Funny, I always have the strange feeling that 'someone' is watching me when I do this stuff. Wonder why?
Keeping it real. My first attempt (not pictured here) was a complete flop. Instead of a broken dishes block, I made pinwheel blocks. But I think the magic of the biscornu is the implied triangles that make the side view. Even on the stitched versions, most of the charts I've seen have a pattern that acknowledges that part of the top and bottom square panels that bends over the side in some way, and the pinwheel didn't do that, but the broken dishes block does.
Plus, attempt number 1 was too small, and it was really difficult to manipulate the seam allowances to get good side seams. Starting with the 3-1/2" scrap squares was much better.
If you're not a stitcher, it's nice to know that there's a quilty version of these cute, and take-my-word, very addictive wonky-shaped softies.
Give it a try? Let me know how it works. It'll cost you a few fabric scraps (who doesn't have those?) and a little bit of time. If you're not into dimensional stuff, this can be a little tricky, so if flat is your thing, this may not be for you. In the meantime, . . .
Happy Stitching!
Joan
PS: Do you receive my weekly Good Migrations newsletter? If not, scroll back up to the top of the sidebar on the right and fill in your name and email address to get stuff like this before it hits the blog. Get a bonus pattern when you do!
Pin this image to find this post again.









No comments:
Post a Comment