Over the long holiday weekend, I did a little picking up in and around the studio. I pulled out about 4-5 yards of 'textured' fabric that I purchased years ago. I don't know what I was thinking when I bought this. It really isn't a good fit for quilting because the weave is quite loose. As I was digging around and tidying up, I got to thinking about a little washcloth project I made years ago from some pattern notes from the local quilt shop, and thought I'd take my 'lemon' textured fabric and turn it into 'lemonade.'
The original project called for osnaburg, also known as prairie cloth. Look for it at the local quilt shop, or at the big box stores like Michaels or Joanns, or you can find it here (affiliate link), if you're stuck - it can be hard to find. As a test, I substituted my loose weave textured fabric for the osnaburg.
Here's what I did. Lotsa photos, very few words. You can make one of these in an hour or two. Great teacher or Father's Day gift paired with a bar of fragrant soap.
Here goes:
You need 2/3 yard of the osnaburg (or loose weave textured cloth) for one wash cloth. Plus some scrap binding and a larger 12" scrap square.
Cut the osnaburg into eight 10" squares (roughly - precision is not necessary)
Stack the eight squares of osnaburg with the 12" fabric square in the center of the pile like a sandwich. Four layers of osnaburg, one 12" fabric square, and four layers of Osnaburg.
Draw a diagonal line corner to corner on the top osnaburg layer.
Then pin the be-jeebers out of it to hold the layers together.
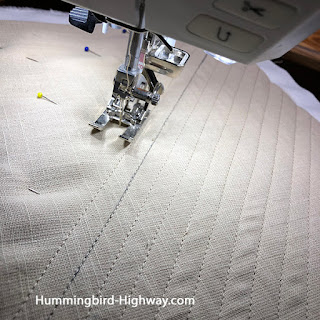
Using a walking or dual feed foot and sew on the line . . .
Using the side of the foot as a guide, topstitch about 1/4" to 3/8" away from the center line, then each stitching line, so you end up with diagonal stitching lines covering your fabric layers. You don't have to sew all the way to the edge of the 12" scrap fabric, just across the osnaburg layers.
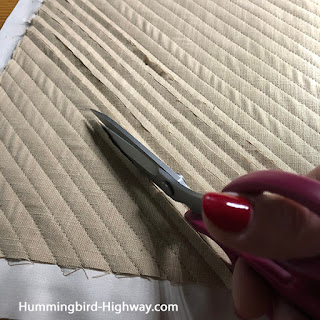
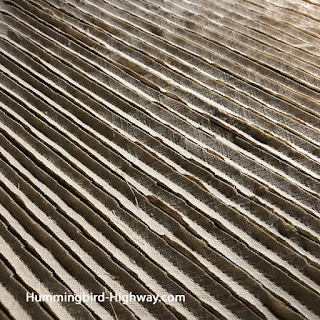
Be careful not to cut the 12" scrap square layer, cut ONLY the osnaburg layers with scissors between each set of seams. Do this on both sides.
You can buy a chenille cutting tool, but the scissors work fine if you're only making a small handful of these.
Center and trim to 9" square.
Then round the corners, roughly. Nothing fancy or measured, just simply rounded (it's a wash cloth). You really don't have to do this step, but for a wash cloth, I think a rounded edge is nice.
Dig into your collection of scrap binding strips (I know you save all those last bits of binding, I just know it.)
Pull out one piece about 6" long and trim 3/4" away from the fold.
Pull out a second binding strip that is about 20-30" long.
Make a hanger from the 6" binding strip by opening the fold, and folding each side to the center, press, and refold. . .then top stitch along each long edge.
Position the hanger on one corner of the trimmed wash cloth and pin in place
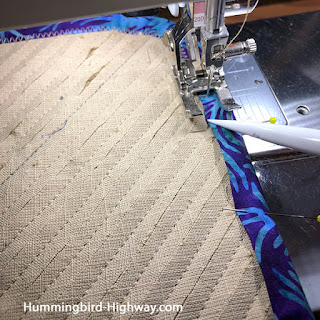
Pin the longer binding strip, raw edges aligned around the perimeter of the wash cloth, just like you would with a quilt.
A little problem here, with those rounded corners, a bias binding would work much better than straight of grain stuff. And I do occasionally have extra bias binding around. However, the larder is empty of bias binding scraps at this moment, but there is plenty of straight grain binding scraps. No, I'm not going to cut perfectly good fabric to make bias binding. It's a wash cloth. A little extra crumple around the corners won't hurt anyone. And if I need a stiletto to ease the binding into place, so be it!
Turn the folded edge to the back and zig zag along the binding edge to secure it.
I know it doesn't look like much at this point, but toss it in the washing machine then the dryer where the magic happens. It comes out soft and puffy, and ready to use or gift.
Top of the photo - washed, made with osnaburg. Bottom of the photo made with the 'textured fabric,' not washed yet
This is the second wash cloth I made with this fabric over the weekend, and I didn't have time to wash it before writing this post. The first was a true trial run to see if this non-osnaburg fabric worked similarly. It was pretty close, the osnaburg is a little fluffier and softer after washing, but this version is definitely useable. It's actually hanging in the shower in between uses right now. Dave put it into action right away. (I didn't think you'd want to see a 'dirty' wash cloth picture, so you kinda need to trust me on this.)
To use up the rest of that textured fabric, I cut it up and stacked it along with some 12" scrap fabric squares (prints work just fine). The stack is waiting for my next sewing session.
I'll go digging into my binding scraps when I'm ready for it.
A perfect way to turn lemons into lemonade! No dirty birds around here! What is your favorite lemon/lemonade project idea?
Happy Stitching!
Joan


No comments:
Post a Comment