Thursday, July 25, 2019

I'm Done!

When I first started making quilts, someone (was that you, Amy H.?) told me that I should take a picture of each quilt as it's finished to keep a record of what I've made. Many, many quilts, and several cameras, detailed scrapbooks, and photo folders later, I still don't consider a quilt 'finished' until I've added a label and taken a picture of it.

I've lost track of some of those photos (someday, I'm going to put together a series of Chatbooks to keep a visual record of my finished quilts, just not this day!), but I am still in the habit of adding the label (most of the time), and taking a photo (nearly all the time).

So what's in a label, after all?


  • It uses some fabric leftovers from the quilt. . . or not
  • It can be fancy or plain
  • It can be generated on the computer . . or not
  • It provides the quilt's 'voice' and records the maker, the pattern source, the purpose (is the quilt a gift?), and special washing instructions


add a label to your quilt


As you can see, I keep it pretty simple. A scrap of fabric, placed on a small piece of sandpaper with information written in my hand using a pigma pen. Then bordered, in this case the borders are mitered. Doesn't really matter where you put the label on the quilt, however, I usually put mine on the lower right corner on the back. I pin it in place with applique pins.

I press the raw edges under about 1/4", then pin the label onto the quilt.


add a label to your quilt


I wear a thimble when I quilt or applique, and I consider the label a lot like applique.

This thimble is a fancy one from TJ Lane - but I have several that I use, some not quite as fancy as this one.

I put the thimble on my middle finger of my right hand - I'm right-handed.


add a label to your quilt


I start sewing with a buried quilters knot. Then come up to grab just a thread or two of the label's folded edge.

Then the needle is inserted into the quilt back and batting, but not all the way through to the quilt top. I travel the point through the batting a short distance and come up through the quilt back and grab another tiny 'bite' of the label fold and repeat the process.


add a label to your quilt


As you can see above, my left hand holds the label in place. My thumb inches along as the stitches are completed. Underneath the quilt (unseen), I keep my left middle finger right under the needle movement. If I feel a slight prick in my middle finger, I've gone through all the layers and I adjust, then carry on.

To add a bit more security (the label can get a beating through use and laundering), I like to add some running stitches in size 8 (in this case) perle cotton along the label edge or border . . .


add a label to your quilt


I'm careful that the running stitches also don't migrate all the way to the front of the quilt, and that they don't just grab the label material but also grab a wee bit of the quilt backing and batting as I 'rock n' roll' the needle to make the stitches.


securing the label to your quilt


With that little embellishment, the label is complete! and so is this quilt (almost!)! (Yay!)

Here's a view of the finished label, and a view of the back of the quilt, so you can see how the quilting I used creates playful texture. 

add a label to your quilt

add a label to your quilt


As I said up front, the quilt isn't complete until it has a label AND a photo. Here are two. One flat on the ground and one a bit more crumpled in a chair. It helps to have a beautiful sunny day!


 Final photo of the quilt

This pattern, "Split the Check" is found in the book ScrapTherapy, The Versatile Nine-Patch and it'll be featured on an upcoming Caribbean cruise in 2021 (not the Hawaii one in 2020!) that hasn't been announced yet. Save your pennies, and watch this newsletter for specifics on the cruise, if you'd like to join in on the fun (Yes, it will be VERY fun!). This particular quilt has lots of setting options, much like a log cabin. This offset barn raising is one of my favorites.

Do you add a label to each and every quilt you finish? Do tell!

Happy Stitching!
Joan

Thursday, July 18, 2019

Reflection

As you've probably heard, this week marks the 50th anniversary of Neil Armstrong's historic first steps on the moon.

This is so remarkable to me on so many levels. I was a kid for that historic step, but still remember watching all the events unfolding on television. As an adult, and as a recent visitor to the Kennedy Space Center in Cape Canaveral, Florida, I'm even more in awe of what was achieved by, not only those who took that amazing journey, but by all the people who supported that effort.

On that recent trip to Florida, one of the exhibits that pulled at my heart was the exhibit hall that held the Space Shuttle Atlantis - the ACTUAL space shuttle itself! And within that exhibit an area that paid tribute to those 14 special people who died in the two space shuttle disasters.


Each of the heroes lost has a dedicated space in the exhibit which includes personal and professional items that had importance to each individual.

The exhibit case pictured below, as a close-up, and above includes items that belonged to Michael P. Anderson, a native of Plattsburgh, NY, which is a short drive from my home in central New York.

His 'Star Trek' lunch box speaks volumes of his passion for space travel from an early age. Makes you wonder what today's future heroes are consuming from the media. Captain America, perhaps? That'd be okay!


And the display dedicated to Kalpana Chawla, also part of the ill-fated Columbia crew, touched my heart. She was an avid bird-watcher, and her favorite book, Jonathan Livingston Seagull by Richard Bach, is one of my all-time favorites, too.

These exhibits touched my soul because they show each Shuttle astronaut's humanity. These were real people with real passions and dreams who probably didn't consider themselves as any kind of extra-ordinary role models or heroes.


Awright. I've been knocked off the internet at least three times since I've started this article. I'm using the data package on my mobile phone (an invention that probably wouldn't have come about if not for the space program) to access my message-writing software. I hope I haven't bored you too much with my musings. 

Happy Stitching
Joan

I'll have more stitchy stuff to report next week.

Thursday, July 11, 2019

Catchin Up

Just before the July 4th holiday, I was in Florida, Cape Canaveral/Cocoa Beach area for a meeting with my business coach.

Direct flights to anywhere are an unusual thing out of the Syracuse airport, so when I saw one, Syracuse to Orlando, I grabbed it. No matter that I had to get up around 4 am to catch the early flight.

That also means I got in to Florida early enough to do a short tour of the Kennedy Space Center.

I have never been there before, and wow! I highly recommend visiting there if you're in the area, especially if you have kids in your party.

It's all the thrill of Disney World, without the rides and the fairy tales!


Real-life heroes are available to meet-and-greet. And the exhibits pull you into the awesomeness of space exploration. This is the main entrance to see the space shuttle Atlantis. Holy cow! Amazing stuff!

Even though I was there on business, you can't go to the 'beach' without actually going to the beach!

As always, early morning is my favorite time before the heat and crowds.

This is just after sunrise. The storm off in the distance kept out of the way on this particular morning, but we did have our fair share of tropical (rainy) weather as the weekend went on.


No trip to the beach is complete without some local flora and fauna. . . this great blue heron was keeping an eye on a beach fisherman just a few feet away. I think he was hoping for [a part of] the day's catch. I'm not sure the fisherman had the same idea. Empty lures, at least while I was watching, disappointed both hopefuls.


Cocoa Beach is very much a vacation spot, even though we were there 'working hard!' We gotta eat, and we managed to find some pretty good grub along the space coast.

This is Carton Brown, of Occasional Occasions Catering by Carlton (Atlanta GA), one of my colleagues in attendance at the meeting. I hear he makes a mad savory cheesecake, but right now he's more intent on that stack of savory ribs for lunch!


Back at home, I was back at making these stitchery blocks for this crazy bordering process I'm developing.

I've talked about this project before and it's progressing nicely, but there are 24 blocks! I'm working on #12!

I started on this pattern series from Erica Michaels, and created this border treatment as an experiment.


As I was working my way through the alphabet blocks, (J is shown, K is finished), I realized that if I want this to be a cohesive quilt eventually, I'd better start planning a bit.

So I grabbed all the blocks that are finished, and headed to the Ford Underground to have easy access to my fabric stash.

I then laid out A-K, some blocks still in progress.


Then envisioned the rest of the quilt block colors, taking into consideration the block subject matter (A=acorn, B=butterfly, C=castle, etc - I didn't want to have a purple acorn, for example) and the eventual 24-block quilt layout.

And selected fat quarters for the remainder of the blocks.


Then, since this might take a while, and I don't want my fabric selections to get scrambled into another project, I labeled each block by letter with a piece of paper pinned to the fat quarter or scrap fabric.


Which left me with a pretty weird arrangement of colors for the blocks-to-be-made.

They don't look like they'll go together in this stack, and I may change some out as I go.

But I now have a clearer picture of where I'm going. Perhaps 'clear' isn't the right word, but I have a plan.

And I think the weird combination will work out fine!


Now that each block has a fabric 'theme,' as I pull out the next one to work on, L in this case, I can choose the floss colors that pull in the stitching and the fat quarter color.

And I have a bit of confidence that all the purple blocks won't be stuffed into one corner of the quilt.

Sometimes I can't get away from the tidy-butt in me!


Happy Stitching!
Joan

Thursday, June 27, 2019

An Hour a Day

The saga of the Split the Check quilt from The Versatile Nine Patch book continues.

Last week, it was pin-basting and the beginning of some straight line quilting.

This week, we've graduated to free motion elements.


Last time, I believe I left off with the straight quilting in-the-ditch and 1/4" along the 'blue' side of the stripes.

A this point, I have added similar in-the-ditch and 1/4" quilting using the walking foot with green thread on the green striped pattern areas, creating a four rows of quilt lines along each striped sashing element.


With all the straight line quilting in place, I switched to the darning foot, dropped the feed dogs on my BERNINA, and moved into free motion territory.

As before, I remove the pins a little at a time to make way for the quilting.

And I chose an easy, fluid fill pattern that looks a bit like connected triangles. As I form the triangle, I make the outside shape, then create a shadow of that shape inside, and leave a path to come out of the shape. This in-and-out technique takes a little practice, but once you get it, it's easy, fun, and fast!


Because I quilt on my domestic machine and not a long arm, I often get questions about 'how' I get the 'whole' quilt into the machine throat. And the answer is I don't (or at least, I rarely do). I usually plan the quilting so I only have to get to the center of the quilt, so that means, I only have to get half of the quilt in the throat at any point.

I don't roll, or use clips. I do work a section at a time and remove pins as I go. Only the ~10-12" square-ish section that I'm working on at the moment is flattened by the palms of my hands and swirled in place under the needle. I'm constantly changing position and direction so rolling up the parts of the quilt I'm not working on doesn't make sense and gets cumbersome.

At least for me. It's hard to describe the process, but I just squish, flatten, and move. A fair amount of practice helps. A long time ago, I also had to let go of the fear (fear of making a mistake, or of 'ruining' the quilt). I feel the quilting adds character, and the look and feel of the organic flowy quilting is my preference for my quilts.

As you can see, each green 'stripe' gets filled in with the stitching.

I'll switch threads back to blue and repeat the process - perhaps with a different fill pattern - in the blue spaces.


Just like last week, the powder blue backing makes it a bit easier to see the quilting pattern as it develops.


And a closer look at the triangle fill free motion quilting from the back of the quilt.


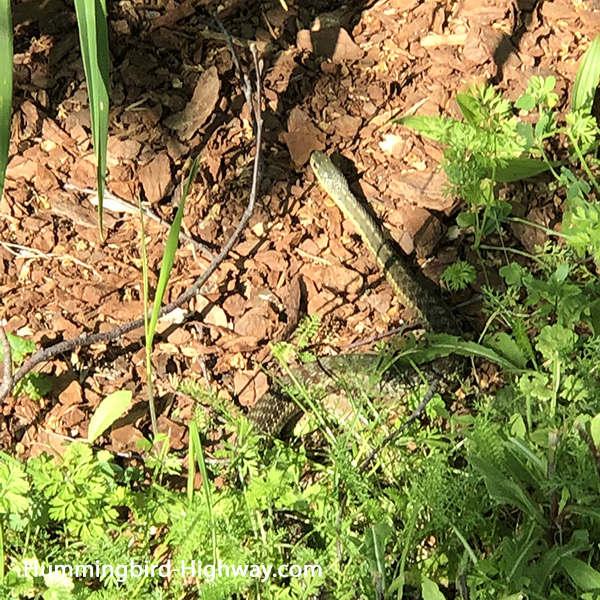
This little garter sssnake ssstartled me while I was sssssnapping picturessss. I think I might have disturbed his sssssleep.


An hour a day at the sewing machine doesn't seem like much. But each hour added advanced the project that one extra step.

At this point, I start to get excited about the finish. Nothing like adding that last stitch to the binding and calling it 'done!'

But not quite yet. . . .

Happy Stitching!
Joan 

Thursday, June 20, 2019

Onward!

With the batting ordered, delivered, and installed in its storage space in the "Ford Underground," it's time to get down to the business of quilting.

Last week, I shared the fluffy saga of a big roll of wool batting entering, rather unceremoniously into its special place in my storage room.

At the end of the post, I showed you this quilt top that is ready for quilting. I'm here to tell you that the next steps are underway.  . . ..

quilt top, ready for quitling

I prefer to pin-baste my quilts. That means I clear away a big patch of basement floor (I have a finished work room in my basement with hard-as-rock pergo flooring), tape the backing to the floor, right side down, with painters tape. Then layer on the batting (the aforementioned wool stuff) and the quilt top.

Smoothing out any lumps and bumps before a new layer is added.

The I park my fluffy brains (otherwise known as my posterior) in the middle of the quilt, and start pin basting, from one end to the other.

Some folks say you have to start basting in the middle and work out. I'm here to tell ya, I don't do that. I start at one end of the quilt and keep going until the whole thing is pinned.

pin basting a quilt

I place the pins pretty close together, about as far apart as cookie dough on a cookie sheet (m-m-m cookies!).

I use this handy little tool (or an old spoon) to save my finger tips. And I use 1-1/4" curved safety pins to get the deed done.

Pin basting a quilt


Why pins and not spray baste?

It's a fair question . . . 1) I prefer pins over spray baste because it leaves a visual record of where I've quilted and where I still need to quilt. As I quilt, I pull out the pins as I go, so if there's a pin, I haven't quilted there yet. 2) I pre-wash most of my fabrics, and every time you wash, the quilt looses color. So I tend not to wash the completed quilt until I have to. Using spray baste implies that I need to wash the quilt sooner rather than later to get the gunk out.

There are a couple other reasons, like the messy overspray, fumes, and my opinion that the pins hold the layers better as I do a lot of crunching and squishing as I quilt, pins are re-usable so I don't have to keep buying more.

With the quilt layers basted, I like to roll the edges of the backing onto and over the quilt and batting edges around the perimeter of the quilt. This sometimes (not always) helps to avoid having those corners folded into the quilting area by accident (enter Mr. Seam Picker to reverse sew that quadruple-layered quilting)

Plus it keeps the quilt edge crisper and makes the quilt easier to handle.

Preparing the quilt edge for quitling


Usually one or two folds takes that extra backing over the quilt edge, then pin with a few more safety pins.

I should add that I quilt my own quilts on my domestic machine (BERNINA 750QE). Prep would be different if you were taking the project to a long arm process.

Preparing the quilt edge for quilting


Then it's time to 'reclaim' the pins.

I almost always start with some straight line stitching using the walking foot. In this case I'm following the diagonal design path to create lines of quilting that are blue and green, and I'm using blue and green thread to match (sorta, close enough) each color area.

Straight line quilting with a walking foot


In this case I'm also adding a line of stitching 1/4" away from the diagonal ditch quilting.

That's as far as I got this week.


Straight line quilting


I think it's a little easier to see what's going on with the quilting when you look at it from the back.

I'm using a plain pale blue backing fabric. Now, if you're not confident about your stitching, then I suggest using a fussy-printy something for the backing - it'll hide any quilting 'issues' better.

Next, I can either add some free-motion fill in the blue spaces, or switch to green thread and repeat the ditch and 1/4" quilting process for the green spaces.

quilting, a view from the back


The puckers you see here between the lines are the pins. Those will go away as the pins are removed and the quilting advances.

The straight line stuff seems to take a long time - I like to be careful to stay on the down-side of the seam, but then things really pick up with the free motion stuff. Or at least I hope so. . . We'll see!

If you have no idea what I mean by that down-side stuff, I talk about it on page 77 of When Bad Things Happen to Good Quilters. I can direct you here if you need a copy! *wink!*

Happy Stitching!
Joan

Thursday, June 13, 2019

Good Things, Not-so-Small Packages

I'm not sure who coined the phrase, "Good things come in small packages."

Sometimes that's true, but when you place an order for a roll of batting, a whole lotta fluff arrives in a pretty big package.

I've been out of wool batting (Hobbs Heirloom wool is my favorite) for a while now. So I picked up the phone and ordered some just the other day. Yesterday it arrived in a soft 'poof' at the front door.

wool batting delivery


I didn't hear the delivery person, so I was surprised by this six food box at my front door when I checked to see if the Orioles finished up the grape jelly and  needed a refill. My view was blocked!

When I get a big package, I sometimes wait and get some assistance from Dave once he gets home from work. But the box was light and easy to bring inside.

But then it blocked the entryway inside!

I opened the box, and started pulling the big batting roll. If I were smart about it, then I could have cut the sides of the box, too. But noo-o-o. The pulling created a little vacuum inside the box. Eventually the whole project took over my entry hall way, at last the batting was birthed!

batting delivery


Okay. Next challenge was getting it downstairs to the "Ford Underground" where I have storage space set aside just for batting.

I opened the basement door, and couldn't resist the temptation to set the roll free to slide down the stairs.

The free-falling batting hit the stack of empty fabric bolts like a bowling ball hitting the pins - I got a spare!

batting


Then finally, removing the plastic created an immediate cloud of fluff as the wool expanded immediately. Wonder how they got all that fluff INTO the bag?

Anyway. I struggled a bit with this oversized toilet-paper-style installation. The batting is light weight but the size made it quite awkward!

I'm kinda glad nobody witnessed this part. . .

batting roll installed


Now that I have batting - and it's where it belongs, I have no excuses. Time to sandwich, baste and quilt this top! The pattern is from The Versatile Nine Patch, called Split the Check. I've been working on it off and on for a few months now.

quilt top, ready to quilt

Happy Stitching!
Joan

Thursday, June 6, 2019

Nothin' Much

After a couple of weeks of how-to's (you can re-visit the scrappy wash cloths here and the fabric biscornu here if you missed them), I don't have much to say for myself this week. . . . well, maybe one or two things . . .

The Genesee Valley Quilt Fest was held this past week in Rochester. 

Wow! Lots of vendors and quilts on display, making the hour-and-change trek to Rochester from Syracuse well worth the trip!

From the second floor of the RIT Field House, you have a bird's eye view of the show.


Genesee Valley Quilt Fest, birds eye view


These next two photos, one full view, the other a detail of the quilting, are of a fabulous quilt made by Nick Williams. The base fabric is a panel called 'Dream Big.' The quilting alone is spectacular, but the applique and the subject matter of that applique overlay (my favorite hummingbirds!) really makes this piece jaw-dropping.


Hummingbird quilt on "Dream Big" panel. Quilt by Nick Williams

Hummingbird quilt on "Dream Big" panel. Quilt by Nick Williams


My cross stitch hummingbird quilt was also on display at the show. Remember my progress reports on this project earlier this year?


Hummingbird quilt, cross stitch


. . . And, of course, there were vendors at the show. I purchased one of those extra-fine mist spray bottles in this booth and received this bee stencil as a bonus! Bees seemed to be everywhere at the show - in the fabric prints on sale in the vendor booths, especially. By the way, I made a few other purchase at the show too! *A-hem!*


bee stencil


Once back home, the purple half-square triangle table runner is now pin-basted. Only a couple evenings ago I started the hand quilting on it.

Can't wait to have it finished.

(Yeah, I'm a little weird, I hate thread basting, so I pin baste and use a hoop to hand quilt--I remove the pins as I quilt. It works for me.)

detail of hand quilting on half square triangle table runner


See, that was quick! Perhaps I'll get myself into more trouble this week. . . I have a few ideas . . . *wink!*

Happy Stitching!
Joan